Pages

Organized Workshop Woodworking Plans for Small Spaces

Organized Workshop Woodworking Plans for Small Spaces

Hey there, fellow woodworkers! So, you're passionate about crafting beautiful things from wood, but your workshop space is… well, let's just say it's "cozy." Don't worry, you're not alone! Many of us passionate crafters have to work with limited space. But that doesn't mean we have to compromise on our projects or our sanity! This guide is all about creating an organized and efficient woodworking workshop, even if you're working with a tiny area. Let's dive in!

Maximizing Your Space: Smart Storage Solutions

The key to a functional small-space workshop is smart storage. Think vertical! Forget sprawling workbenches that eat up precious square footage. Let's explore some space-saving strategies.

Vertical Storage: Reaching for the Sky

Wall-mounted storage is your best friend. Think pegboards, slatwall systems, and even simple shelves mounted high on the walls. You can hang tools, clamps, sanding blocks, and pretty much anything you can think of. It gets those items off your already limited floor space. Invest in good quality hooks and organizers; this will make a huge difference in the longevity of your storage system. Plus, everything will be easily visible, so you'll know exactly where everything is.

Cabinetry Magic: Hidden Storage

If your budget allows, consider tall, narrow cabinets. These are space-saving marvels, ideal for storing smaller tools, supplies, and even lumber if you're clever about how you stack and organize it. Think about using drawer dividers to keep things neat and easily accessible within those cabinets. A rolling cart can also do wonders for increasing storage capacity and mobility within a small workshop. Remember, every inch counts!

Smart Shelving: Optimizing Vertical Space

Standard shelves are great, but think about using adjustable shelves. This gives you the flexibility to change the configuration as your needs evolve. Also, consider using shelf dividers to keep things from toppling over. This is particularly helpful for smaller items like screws, nails, and sandpaper. Label everything clearly for easy retrieval. And don't underestimate the power of a good shelf liner to prevent items from sliding around.

Choosing the Right Tools: Less is More

In a small space, owning a lot of tools can be counterproductive. Focus on acquiring high-quality, versatile tools that can perform multiple functions. This will minimize clutter and maximize efficiency. Don't feel pressured to buy everything at once. Build your collection gradually as needed.

Essential Tool Selection: Prioritize Functionality

Consider these essential tools for a small woodworking workshop:

  • A good quality hand saw
  • A reliable hand plane
  • A selection of chisels (at least a few sizes)
  • A drill/driver with a variety of bits
  • A random orbital sander
  • Clamps (a few different sizes)
  • Measuring tools (tape measure, square, combination square)
  • Safety glasses and hearing protection (essential!)

Tool Organization: Keep it Streamlined

Keep your tools organized using the storage solutions we discussed earlier. Consider using tool rolls or magnetic strips for smaller tools. Hang power tools on the wall, and store hand tools neatly in drawers or on shelves. Regularly clean up your workspace to prevent a build-up of dust and debris.

Workflow Optimization: Streamlining Your Process

In a small workshop, an efficient workflow is crucial. Think about how you typically work and design your space to minimize movement and maximize efficiency.

Designated Work Zones: Clear Separation

Even in a small space, try to designate different zones for different tasks: a cutting zone, a sanding zone, a finishing zone. This will help keep things organized and prevent accidental cross-contamination of materials.

Material Management: A Tidy Workspace

Keep your lumber and other materials neatly organized and readily accessible. Consider using a lumber rack or storing lumber vertically against the wall if space allows. Properly store wood to prevent warping and damage. This prevents clutter and makes it easier to find the materials you need when working on a project. Always clean up your mess at the end of each session.

Mobile Workbench: Flexibility is Key

Instead of a large, fixed workbench, consider using a smaller, mobile workbench. This gives you the flexibility to move it around as needed and maximizes floor space when not in use. You can even find collapsible workbenches that are easily stored away when not needed.

Lighting and Ventilation: Essential Considerations

Good lighting and ventilation are often overlooked but essential for a safe and comfortable workspace. Poor lighting can strain your eyes, and inadequate ventilation can lead to health problems from sawdust inhalation.

Bright Lighting: Illuminate Your Work

Invest in good quality task lighting, such as LED work lights, to illuminate your work area properly. Make sure you have adequate overhead lighting as well, so you can see your entire workspace.

Ventilation: Breathe Easy

If your workshop doesn't have good natural ventilation, invest in a dust collection system or a good quality air purifier to remove sawdust and other airborne particles. Regularly clean your workshop to prevent dust buildup.

Commonly Asked Questions

Q: What if I don't have much wall space?

A: Even with limited wall space, you can still utilize vertical storage. Think about using taller, narrower cabinets and shelves. Consider using the space under your workbench for storage as well. Every inch counts!

Q: How can I keep my tools organized without spending a fortune?

A: Repurpose what you already have! Use old containers, jars, and even repurposed cardboard boxes to organize your small tools and supplies. Get creative with your storage solutions.

Q: What's the best way to organize lumber in a small space?

A: Store lumber vertically if possible, against a wall. This saves valuable floor space. You can also use a small lumber rack. Properly stacking and organizing your lumber will prevent warping and damage.

Q: How can I make my small workshop feel less cramped?

A: Keep your workspace clean and clutter-free. Use light and bright colors on your walls to make the space feel more open. Good lighting and organization can make a huge difference in how spacious your workshop feels.

Remember, creating a functional and organized small-space woodworking workshop is all about smart planning and efficient use of space. With a little creativity and effort, you can transform your cramped corner into a highly productive and enjoyable woodworking haven!

Read More..

Downloadable Woodworking Plans for Flexible and Convenient DIY Projects

Downloadable Woodworking Plans: A Comprehensive Guide to Flexible and Convenient DIY Projects

The allure of crafting functional and aesthetically pleasing pieces from wood is undeniable. Woodworking, however, often presents a barrier to entry: the perceived complexity of design and construction. Fortunately, the advent of readily available downloadable woodworking plans has significantly democratized this rewarding hobby. This guide explores the numerous advantages of utilizing downloadable plans, the diverse project options they offer, and considerations for selecting the right plans to match your skill level and aspirations.

The Advantages of Downloadable Woodworking Plans

Downloadable woodworking plans offer a multitude of benefits compared to traditional methods, making woodworking accessible to a wider range of enthusiasts.

Accessibility and Convenience

The most significant advantage is the unparalleled accessibility. Unlike scouring dusty bookshops or relying on limited local resources, downloadable plans provide instant access to a vast library of designs from the comfort of your own home. This eliminates geographical limitations and allows for flexible project scheduling, fitting your woodworking endeavors around your personal timetable. Furthermore, the digital format facilitates easy storage and retrieval, preserving your plans for future projects or reference.

Cost-Effectiveness

Downloadable plans often represent a significantly more economical option than purchasing pre-made plans or attending workshops. The one-time cost of a digital plan far outweighs the recurring expenses associated with other methods. This makes it a particularly attractive option for beginners venturing into woodworking who may be hesitant about large initial investments.

Detailed Instructions and Visual Aids

Reputable providers of downloadable plans generally offer comprehensive instructions, encompassing detailed diagrams, cut lists, material specifications, and step-by-step assembly guides. These visual aids simplify even complex projects, minimizing potential errors and fostering confidence throughout the building process. Many plans also include supplementary resources like videos or links to tutorials, further enhancing the learning experience.

Customization and Flexibility

While many plans offer standardized designs, the digital format often facilitates customization. You may adapt dimensions, materials, or finishes to suit your individual preferences or the specific requirements of your project. This adaptability allows for creative expression and personalizes the end product, making it truly unique.

Diverse Project Options Available Through Downloadable Plans

The scope of projects available through downloadable woodworking plans is vast and caters to all skill levels, from beginner-friendly projects to intricate, advanced designs. The diversity ensures that you can find a project that aligns with your capabilities and interests.

Beginner-Friendly Projects:

Numerous plans cater specifically to novice woodworkers. These often involve simple joinery techniques, minimal tools, and straightforward instructions. Popular options include:

  • Simple shelves
  • Birdhouses
  • Small storage boxes
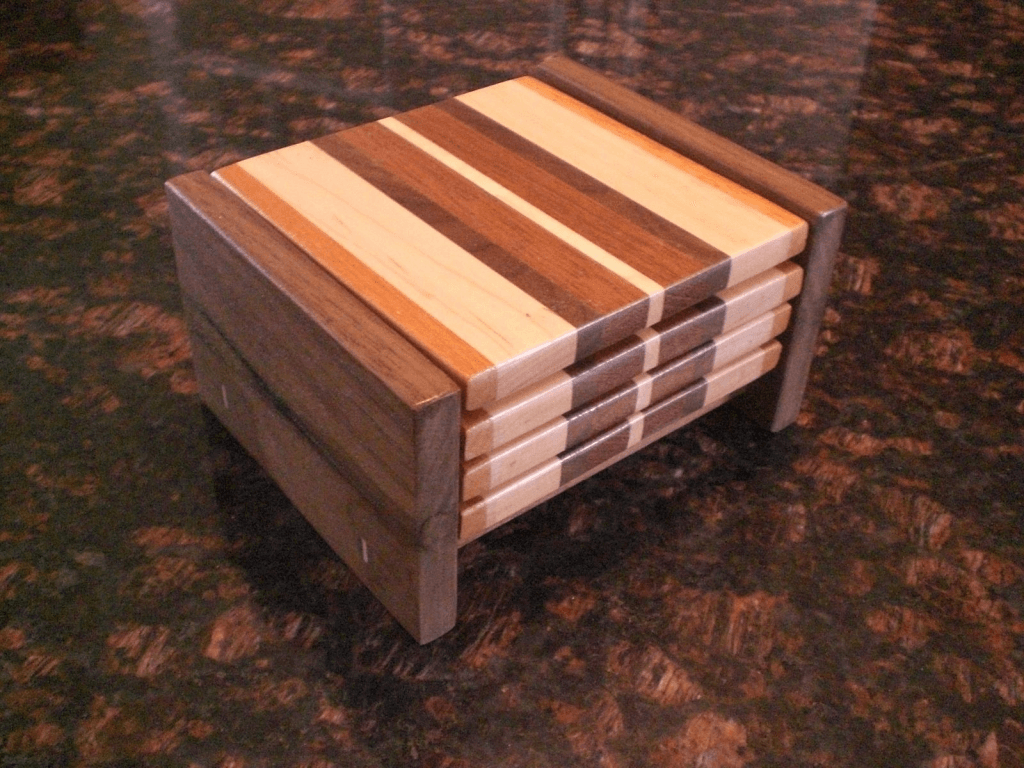
  • Coasters
  • Cutting boards

These projects allow beginners to build their confidence and familiarity with basic woodworking skills before progressing to more complex designs.

Intermediate Projects:

Once a foundation of woodworking skills is established, intermediate projects can be tackled. These plans typically involve more intricate joinery, potentially incorporating mortise and tenon joints, dovetail joints, or more complex shapes. Examples include:

  • Chairs
  • Tables (coffee tables, end tables)
  • Bookshelves
  • Picture frames
  • Small furniture pieces

These projects hone woodworking skills and introduce more sophisticated techniques.

Advanced Projects:

For experienced woodworkers, downloadable plans offer ambitious projects that challenge their skills and creativity. These often involve intricate designs, specialized tools, and meticulous attention to detail. Some examples are:

  • Custom cabinets
  • Detailed architectural models
  • Intricate musical instruments
  • Fine furniture pieces (e.g., dressers, armoires)
  • Complex joinery projects

These demanding projects reward dedication and expertise with truly stunning results.

Choosing the Right Woodworking Plans: Key Considerations

Selecting the appropriate plans is crucial for a successful and enjoyable woodworking experience. Consider the following factors before making a purchase:

Skill Level Assessment

Honestly evaluate your current skill level. Don't attempt a complex project if you lack the fundamental skills. Starting with simpler projects builds confidence and progressively develops your abilities. Many plan providers clearly indicate the skill level required for each design.

Project Goals and Preferences

Define your project objectives. What do you hope to achieve? Do you need a specific item for your home, or are you simply looking for a challenging and rewarding project? Consider the style, size, and functionality of the finished product. Select plans that align with your personal aesthetic preferences and intended use.

Material Selection and Availability

Research the required materials. Ensure you have access to the specified types and quantities of wood and other components. Consider the cost of materials and their availability in your local area.

Tool Requirements

Review the tool list carefully. Determine if you possess all the necessary tools. If not, assess whether renting or purchasing the required tools is feasible within your budget. Starting a project only to discover a missing essential tool can lead to frustration and delays.

Plan Provider Reputation

Choose reputable plan providers. Read reviews and testimonials to gauge the quality of their plans, customer support, and overall reputation. Look for providers who offer clear, well-organized plans with accurate diagrams and comprehensive instructions.

Downloadable woodworking plans offer an unparalleled opportunity to explore the rewarding world of woodworking. With careful planning and consideration of your skill level and project goals, you can embark on a journey of creative self-expression and tangible accomplishment. The flexibility, accessibility, and cost-effectiveness of these plans make woodworking accessible to all, regardless of experience level.

Read More..

Build a Spacious and Functional Desk with These Woodworking Plans

Constructing a Spacious and Functional Workstation: Comprehensive Woodworking Plans

This document provides detailed plans for building a spacious and functional workstation, ideal for home offices, workshops, or any environment requiring ample workspace. The design prioritizes both aesthetic appeal and robust construction, utilizing readily available materials and straightforward joinery techniques. The finished product will be a durable and adaptable piece of furniture capable of withstanding years of use.

I. Material Selection and Preparation

Choosing the right materials is paramount to the success of this project. While various hardwoods and softwoods are suitable, maple, oak, or cherry offer a balance of strength, workability, and aesthetic appeal. Consider the intended use and environment when making your selection. For example, a workshop desk might benefit from a more durable hardwood like oak, while a home office desk might utilize a more visually appealing cherry.

A. Lumber Requirements:

The following quantities are estimations and may need adjustment based on your desired dimensions and chosen wood thickness. Always purchase slightly more lumber than estimated to account for potential errors and waste.

  • Desk Top: Two pieces of 1 ½" thick lumber, dimensions dependent on desired desktop size (e.g., 72" x 30").
  • Legs: Four pieces of 2" x 4" lumber, cut to your desired leg height (e.g., 30").
  • Aprons (supporting the desktop): Four pieces of 1" x 6" lumber, cut to the length of the desktop's shorter side (e.g., 30").
  • Support Braces (for added stability): Four pieces of 1" x 4" lumber, cut to length as determined by the apron and leg assembly (detailed in Section III).
  • Drawer Sides (if incorporating drawers): Two pieces of ½" plywood or solid wood, cut to the desired drawer dimensions.
  • Drawer Fronts and Bottoms: Select lumber or plywood to match drawer sides.
  • Hardware: Wood screws (various sizes), wood glue, finish (e.g., paint, stain, varnish), drawer slides.

B. Lumber Preparation:

Before commencing construction, all lumber should be properly prepared. This includes:

  • Planing: Use a planer or hand plane to ensure all surfaces are smooth and even. This improves joinery and the overall aesthetic quality.
  • Jointing: For precise joinery, especially for the desktop, jointing the edges is crucial. This creates perfectly straight and square edges for accurate glue-up.
  • Sanding: Sand all surfaces thoroughly, progressing through various grits (e.g., 80, 120, 220) to achieve a smooth finish. This is essential for both the functionality and the visual appeal of the finished product.

II. Desktop Assembly

The desktop forms the central element of the workstation. A robust and stable desktop is crucial for comfortable and productive work. This section outlines the assembly process for a two-piece desktop.

A. Edge Preparation:

For a seamless desktop, the edges of the two lumber pieces require precise preparation. Apply wood glue to the edges that will be joined and clamp firmly, ensuring even pressure along the entire length. Allow the glue to dry completely according to the manufacturer's instructions.

B. Surface Finishing:

Once the glue is fully cured, the desktop surface can be further refined. This may include additional sanding to remove any imperfections or glue squeeze-out. After sanding, apply a chosen finish (stain, paint, varnish) according to the manufacturer's recommendations. Multiple coats may be necessary to achieve the desired level of protection and aesthetic quality. Allow ample drying time between coats.

III. Frame Construction

The frame provides structural support for the desktop and serves as the foundation of the workstation. This section details the construction of the leg and apron assembly.

A. Leg Attachment:

The legs are attached to the aprons using robust joinery techniques. Mortise and tenon joints offer exceptional strength and stability but require advanced woodworking skills. Alternatively, pocket hole joinery provides a simpler and equally effective method, particularly for beginners. Attach the legs to the aprons using wood screws and wood glue. Ensure the frame is square and aligned before tightening screws.

B. Support Braces:

To enhance stability, support braces are installed between the legs and aprons. This prevents racking and ensures the longevity of the structure. The braces are cut to fit diagonally between the legs and aprons. Attach using wood screws and wood glue.

C. Frame Assembly:

Once all components are attached, inspect the frame for squareness and stability. Any imperfections should be addressed before proceeding. The entire frame can be sanded and finished to match the desktop.

IV. Desktop Attachment and Finishing Touches

The final stage involves attaching the completed desktop to the frame and adding any desired finishing touches.

A. Desktop Mounting:

The desktop is mounted onto the frame using screws that are countersunk and plugged for a clean finish. Ensure the desktop is securely fastened and level.

B. Drawer Installation (Optional):

If incorporating drawers, construct the drawer boxes and install drawer slides according to the manufacturer's instructions. Ensure the drawers operate smoothly and align perfectly with the drawer fronts.

C. Final Finishing:

A final inspection ensures all components are securely fastened and the workstation is stable and functional. Apply a final coat of finish if necessary, ensuring all surfaces are protected. This final step enhances the longevity and aesthetic appeal of your handcrafted workstation.

V. Safety Precautions

Woodworking involves the use of sharp tools and heavy materials. Always prioritize safety by wearing appropriate safety gear, including eye protection, hearing protection, and dust masks. Ensure your workspace is well-lit and organized. Follow all manufacturer instructions for power tools and always use caution when operating machinery.

This detailed plan provides a comprehensive guide for building a spacious and functional workstation. By carefully following these instructions and prioritizing safety, you can construct a durable and aesthetically pleasing piece of furniture that will serve you well for years to come. Remember to adjust the dimensions and specifications to meet your specific needs and preferences.

Read More..

Free Woodworking Plans for Custom Home Decor

Free Woodworking Plans for Custom Home Decor: Elevating Your Living Spaces with Crafted Elegance

The allure of handcrafted home decor is undeniable. It imbues a space with personality, reflecting the creator's skill and the unique character of the materials used. While commissioned pieces can be costly, the rewarding alternative lies in crafting your own decorative elements. This article provides a comprehensive exploration of readily available free woodworking plans, empowering you to design and construct bespoke home decor, transforming your living spaces into personalized havens of elegance and style.

Navigating the World of Free Woodworking Plans

The internet offers a treasure trove of free woodworking plans, catering to various skill levels and design aesthetics. However, navigating this vast resource requires a discerning approach. It's crucial to evaluate the quality and clarity of the plans before embarking on a project. Look for plans that include detailed diagrams, precise measurements, comprehensive material lists, and clear, step-by-step instructions. Reputable websites and experienced woodworkers often provide such meticulously crafted plans, ensuring a smooth and successful project.

Identifying Reliable Sources for Free Woodworking Plans

Several reputable sources offer free woodworking plans, each with its own strengths and focuses. These include:

  • Dedicated Woodworking Websites: Many websites specialize in providing woodworking plans, tutorials, and community forums. These platforms often feature plans submitted by experienced woodworkers, frequently reviewed and vetted for accuracy and clarity.
  • DIY and Home Improvement Blogs: Numerous blogs dedicated to DIY projects and home improvement feature free woodworking plans alongside insightful tutorials and tips. These often offer a more casual approach, providing plans for simpler projects ideal for beginners.
  • Online Forums and Communities: Engaging with online woodworking communities allows access to a wealth of shared knowledge and plans. Members often contribute and refine existing plans, fostering collaboration and the creation of updated, improved versions.
  • YouTube Channels: Numerous YouTube channels demonstrate woodworking techniques and projects, often providing links to free plans in the description boxes. These visual tutorials can be particularly helpful for beginners, clarifying complex steps.

Essential Considerations Before Commencing a Project

Before diving into a project, several crucial factors warrant careful consideration:

  • Skill Level: Choose plans appropriate to your woodworking experience. Beginners should start with simpler projects, gradually increasing complexity as their skills improve. Attempting an advanced project prematurely can lead to frustration and potentially hazardous situations.
  • Tools and Equipment: Assess the tools and equipment required for the chosen project. Ensure you possess the necessary tools or have access to them through rentals or shared workshops. Improper tools can compromise the quality of the finished product and present safety risks.
  • Material Selection: Select high-quality wood suitable for the intended project. The type of wood significantly influences the final aesthetic, durability, and ease of working. Consider the wood's grain, hardness, and susceptibility to warping or cracking.
  • Time Commitment: Realistically assess the time required to complete the project. Woodworking projects can be time-consuming, requiring patience and dedication. Proper time management prevents rushed work and ensures a high-quality outcome.

Exploring Diverse Home Decor Projects with Free Woodworking Plans

The versatility of woodworking allows for the creation of an extensive range of custom home decor. Free woodworking plans cater to diverse styles and preferences, from rustic farmhouse charm to sleek modern minimalism. Let's explore some popular project categories:

Rustic Farmhouse Decor: Crafting Warmth and Charm

Rustic farmhouse decor often employs natural wood tones and simple, unpretentious designs. Free woodworking plans readily available include:

  • Floating Shelves: Simple yet functional, floating shelves add character and storage to any room. Many plans offer variations in size, shape, and mounting styles.
  • Coat Racks: Rustic coat racks, often featuring reclaimed wood or distressed finishes, add a touch of country charm to entryways and hallways.
  • Candle Holders: Simple candle holders, crafted from reclaimed wood or rough-hewn timber, create a warm and inviting ambiance.
  • Picture Frames: Custom-built picture frames, incorporating unique designs and wood types, add a personal touch to cherished photographs and artwork.

Modern Minimalist Decor: Clean Lines and Functional Elegance

Modern minimalist design prioritizes clean lines, simple forms, and functional elegance. Free woodworking plans for this style might include:

  • Geometric Wall Art: Simple geometric shapes, crafted from smooth, polished wood, create visually striking wall art.
  • Side Tables: Sleek side tables, featuring minimalist designs and hidden storage, add a touch of contemporary sophistication to living spaces.
  • Desk Organizers: Clean-lined desk organizers, crafted from fine woods, add a touch of functional elegance to home offices.
  • Floating Shelves (Modern Variations): Modern interpretations of floating shelves, featuring streamlined designs and hidden mounting hardware, provide both storage and visual appeal.

Beyond the Basics: Exploring More Advanced Projects

For experienced woodworkers, free woodworking plans extend to more complex and ambitious home decor pieces:

  • Custom Bookcases: Tailor-made bookcases, incorporating unique design elements and specialized storage solutions, provide functional and visually appealing storage.
  • Coffee Tables: Crafting a coffee table requires advanced woodworking skills, but the result is a stunning piece of bespoke furniture.
  • Mirrors with Custom Frames: Creating a mirror with an intricately crafted wooden frame elevates the look of any room.
  • Jewelry Boxes: Intricate jewelry boxes, featuring multiple compartments and decorative elements, make exquisite gifts or personal treasures.

Conclusion: Unleashing Your Creative Potential

Free woodworking plans offer an exceptional avenue for crafting unique and personalized home decor. By carefully selecting plans, sourcing high-quality materials, and dedicating sufficient time, you can transform your living spaces into reflections of your creativity and personal style. The journey of crafting your own home decor is not merely about the finished product; it's a process of learning, skill-building, and self-expression. Embrace the challenge, unleash your creative potential, and enjoy the rewarding experience of crafting beautiful, bespoke pieces for your home.

Read More..

Get Downloadable Woodworking Plans for Easy Access

Acquiring and Utilizing Downloadable Woodworking Plans for Enhanced Project Execution

The proliferation of digital resources has revolutionized numerous fields, and woodworking is no exception. Access to a vast library of downloadable woodworking plans offers amateur and professional craftspeople alike unparalleled opportunities for project development. This comprehensive guide explores the acquisition, utilization, and advantages of leveraging downloadable woodworking plans, emphasizing the importance of careful selection and meticulous execution for optimal results.

Locating Reliable Sources of Downloadable Woodworking Plans

The abundance of online resources necessitates a discerning approach when seeking downloadable woodworking plans. Not all sources provide accurate, comprehensive, or safe plans. Therefore, due diligence is crucial to ensure the quality and suitability of chosen plans before undertaking any project.

Reputable Online Retailers and Marketplaces

Numerous reputable online retailers and marketplaces specialize in digital woodworking plans. These platforms often offer a wide selection of plans categorized by skill level, project type, and style. Many provide customer reviews and ratings, allowing users to gauge the quality and accuracy of plans before purchase. Examples include established e-commerce sites, dedicated woodworking online stores, and digital marketplaces that host creators specializing in woodworking plans. Thorough research and scrutiny of seller ratings are essential to minimize the risk of acquiring poorly designed or incomplete plans.

Woodworking Blogs and Websites

Many woodworking blogs and websites offer free or paid downloadable woodworking plans. While free plans can be enticing, it's crucial to evaluate their quality critically. Free plans may lack the detailed instructions, precise measurements, and comprehensive diagrams found in paid plans. However, reputable woodworking blogs and websites often provide high-quality free plans as a means of attracting users and demonstrating expertise. Always check the credibility of the source before relying on their plans.

Specialized Woodworking Forums and Communities

Online woodworking forums and communities can be invaluable resources for locating downloadable woodworking plans. Members often share their own plans, provide feedback on commercially available plans, and offer support to those working on projects. However, it's essential to approach plans obtained from forums with caution, verifying their accuracy and completeness before commencing work. The quality of plans shared within these communities can vary significantly, so critical evaluation remains essential.

Evaluating and Selecting Appropriate Woodworking Plans

Careful consideration of several factors is crucial before selecting and downloading woodworking plans. Failing to thoroughly assess the plan can lead to project failures, wasted materials, and frustration.

Skill Level Assessment

Accurately assessing your woodworking skill level is paramount. Attempting a project beyond your capabilities can result in significant difficulties and potentially jeopardize the project's success. Choose plans clearly labeled with an appropriate skill level, ensuring a comfortable challenge without overwhelming complexity. Begin with simpler projects and gradually progress to more advanced designs as your skills develop.

Project Requirements and Specifications

Clearly defined project requirements are non-negotiable. Carefully review the plan's specifications, including dimensions, materials lists, and tool requirements. Ensure that you have access to the necessary tools, materials, and workspace before commencing the project. The plan should provide precise measurements and detailed instructions to avoid any ambiguity.

Plan Clarity and Completeness

A well-structured and comprehensive plan is essential for successful project completion. Examine the plan's format, ensuring it is clear, easy to understand, and contains detailed diagrams, step-by-step instructions, and a comprehensive materials list. Ambiguous or incomplete plans should be avoided, as they can lead to errors and rework.

Customer Reviews and Ratings

Leveraging customer reviews and ratings can provide valuable insights. Before committing to a purchase, thoroughly examine customer reviews and ratings to gauge the plan's quality, accuracy, and overall user experience. Negative reviews can highlight potential issues or shortcomings that you should be aware of before proceeding.

Utilizing Downloadable Woodworking Plans Effectively

Once you have acquired suitable plans, utilizing them effectively is critical for successful project execution. This involves careful preparation, meticulous execution, and diligent record-keeping.

Pre-Project Preparation

Prior to commencing the project, carefully review the plan in its entirety. Familiarize yourself with each step, ensuring you understand the process and have all necessary tools and materials. Create a detailed checklist to track your progress and ensure that all steps are completed accurately.

Step-by-Step Execution

Follow the instructions meticulously, taking your time and ensuring accuracy at each stage. Double-check measurements before cutting or assembling components. If any aspect of the plan is unclear, seek clarification before proceeding. Consider taking photographs of your progress to aid in troubleshooting or for future reference.

Troubleshooting and Problem Solving

Inevitably, challenges may arise during the project. Consult the plan for troubleshooting advice, or utilize online resources or woodworking communities for assistance. Document any modifications or adjustments made to the original plan, as these might be helpful for future projects.

Post-Project Review

After project completion, review the entire process, noting any areas where improvements could be made. This critical self-assessment enhances your woodworking skills and prepares you for future projects. Consider sharing your experiences and feedback on the plan, whether positive or negative, to help other woodworkers.

Advantages of Using Downloadable Woodworking Plans

The utilization of downloadable woodworking plans offers numerous advantages compared to traditional methods:

  • Accessibility: Access to a vast library of plans from anywhere with an internet connection.
  • Convenience: Eliminates the need for searching through physical books or magazines.
  • Cost-Effectiveness: Many free plans are available, while paid plans are often cheaper than purchasing physical plans or attending woodworking classes.
  • Variety: Access to a wide range of projects and styles, catering to different skill levels and preferences.
  • Searchability: Easily search for specific project types or styles using keywords.
  • Portability: Carry plans on electronic devices for easy access in the workshop.
  • Scalability: Many plans offer options for adjusting dimensions to suit individual needs.

In conclusion, the strategic acquisition and effective utilization of downloadable woodworking plans significantly enhances the woodworking experience, facilitating project success and fostering continuous skill development. By diligently following the guidelines outlined in this guide, woodworking enthusiasts can unlock a world of creative possibilities and achieve remarkable results.

Read More..

Wooden craft tutorials for holiday decorations

Unleash Your Inner Craftsperson: Wooden Holiday Decorations

The scent of pine, the twinkle of lights, and the comforting warmth of a handmade decoration â€" there’s nothing quite like the holiday season. This year, ditch the mass-produced ornaments and embrace the joy of crafting your own unique wooden decorations. These tutorials will guide you through creating stunning pieces, perfect for adorning your tree, mantelpiece, or gifting to loved ones. Get ready to transform simple wood slices and scraps into festive masterpieces!

Rustic Wooden Stars

These charming stars exude rustic charm and require minimal tools. Begin by selecting thin wood slices, approximately ¼ inch thick. You can find these at craft stores or even salvage them from fallen branches (ensure they're properly dried!). Using a pencil, lightly sketch a five-pointed star onto each slice. Now, grab your saw â€" a coping saw or jigsaw works best â€" and carefully cut along your pencil lines. Sand the edges smooth, paying close attention to any rough spots. Finally, add a touch of personality: paint them in festive colors, add glitter, or leave them in their natural beauty for a truly minimalist look. Hang them using twine or ribbon.

Adding Detail and Texture

Elevate your rustic stars with added textures. Before painting, consider lightly distressing the wood with sandpaper to create a more aged appearance. Or, use a wood-burning tool to etch intricate patterns or festive designs onto the surface. Experiment with different paint techniques, such as dry brushing or sponging, for unique effects. You could even add small, carefully glued-on embellishments like miniature pine cones or berries for extra festive flair.

Whimsical Wooden Ornaments

Let your imagination run wild with these versatile ornaments. Start with small, square or rectangular pieces of wood. Using a wood-burning tool, etch simple shapes like snowflakes, reindeer, or Christmas trees. Alternatively, use stencils and acrylic paints for a bolder, more vibrant look. Once the paint is dry (allow ample time), seal your creations with a varnish to protect the paint and add a subtle sheen. Drill a small hole at the top of each ornament for easy hanging with ribbon or twine. Choose colors that complement your holiday theme â€" a monochrome palette for a chic aesthetic or bright, bold hues for a cheerful vibe.

Embellishment Ideas for Wooden Ornaments

Don't limit yourself to just painting and burning! Explore a myriad of embellishment options:

  • Glue on tiny beads or sequins for added sparkle.
  • Attach miniature pom-poms for a playful touch.
  • Use fabric scraps to create miniature bows or flags.
  • Incorporate natural elements like dried flowers or cinnamon sticks.

Simple Wooden Slice Angels

These elegant angels are surprisingly easy to make. Choose relatively thick wood slices, about ½ inch thick. Using a pencil, lightly sketch the outline of an angel's wings and head. Next, carefully cut out the shape using a jigsaw or coping saw. Sand the edges smoothly, taking care not to compromise the delicate wings. Paint the angel white or a soft pastel shade. Add details like a halo using gold paint and draw on simple facial features. Attach a small loop of twine or ribbon at the top for hanging.

Creating your own wooden holiday decorations is not only a rewarding experience, but it allows for personalization and customization, creating cherished keepsakes that you'll treasure for years to come. So gather your materials, unleash your creativity, and enjoy the magic of handcrafted holiday cheer!

Read More..

DIY Wooden Shelves for Bathrooms and Storage Spaces

Unlock Your Storage Potential: Build Stunning DIY Wooden Shelves

Tired of cluttered bathrooms and overflowing storage spaces? Transform your home with the simple elegance and practicality of custom-built wooden shelves. This project, while seemingly daunting, is surprisingly achievable even for novice DIYers. We'll guide you through each step, from selecting the perfect wood to installing your gleaming new shelves, empowering you to create beautiful, functional storage solutions that perfectly match your style and needs.

Choosing Your Wood and Materials

The heart of any successful DIY project lies in material selection. For bathroom shelves, prioritize water-resistant wood like cedar or redwood, known for their natural resistance to moisture and rot. For general storage, options expand to include pine, oak, or even reclaimed wood for a rustic charm. Consider the aesthetic you're aiming for: a sleek modern look might call for smooth, stained wood, while a farmhouse style benefits from a more natural, possibly unfinished, finish. Beyond the wood, gather your essential tools: a measuring tape, level, saw (circular saw or hand saw, depending on your skill and the wood's thickness), drill, screwdriver, wood glue, screws, sandpaper (various grits), stain or paint (optional), and finishing sealant (essential for bathroom shelves).

Essential Tool Checklist

  • Measuring Tape
  • Level
  • Saw (Circular or Hand Saw)
  • Drill
  • Screwdriver
  • Wood Glue
  • Screws (appropriate size and length)
  • Sandpaper (various grits)
  • Stain or Paint (optional)
  • Finishing Sealant (especially for bathrooms)

Cutting and Assembling Your Shelves

Carefully measure your desired shelf dimensions and transfer these measurements to your chosen wood. Use a pencil to mark the cuts precisely. For clean, straight cuts, a circular saw is recommended, but a hand saw works perfectly well with patience and a steady hand. Remember to always prioritize safety: wear safety glasses and ensure proper ventilation when using power tools. Once you've cut all your pieces, use wood glue and screws to assemble the shelf units. Pre-drill pilot holes to prevent the wood from splitting, particularly with harder woods. Ensure all joints are square and secure for optimal stability.

Finishing Touches: Sanding, Staining, and Sealing

Once assembled, meticulously sand your shelves, starting with a coarser grit sandpaper to remove any rough edges, then gradually transitioning to finer grits for a smooth finish. This step is crucial for both aesthetics and ensuring a flawless application of any stain or paint. Apply your chosen stain or paint according to the manufacturer's instructions, allowing ample drying time between coats. Finally, seal your shelves with a water-resistant sealant, especially crucial for bathroom installations to protect the wood from moisture damage and mold growth. This step significantly extends the life of your shelves. Allow the sealant to dry completely before installation.

Installing Your Stunning New Shelves

Locate the studs in your wall using a stud finder to ensure secure and stable mounting. Mark the positions for your shelf brackets on the wall. Pre-drill pilot holes for the screws to avoid splitting the wall or the shelf brackets. Securely attach the brackets to the wall using appropriate screws. Carefully position your shelves onto the brackets, ensuring they are level. Admire your handiworkâ€" you've successfully transformed your space! With a little time and effort, you've created beautiful, functional shelves, perfectly tailored to your storage needs, adding both style and practicality to your home.

Read More..

DIY Wooden Toy Projects That Are Perfect for Gift Shops and Craft Fairs

DIY Wooden Toy Projects That Are Perfect for Gift Shops and Craft Fairs

DIY Wooden Toy Projects That Are Perfect for Gift Shops and Craft Fairs

Looking for a unique and profitable way to showcase your crafting skills? Handmade wooden toys are a timeless classic that always captures the hearts of children and adults alike. These charming creations are not only beautiful but also environmentally friendly, making them a perfect choice for eco-conscious shoppers. With a little creativity and some basic woodworking skills, you can craft a variety of wooden toys that will fly off the shelves at gift shops and craft fairs.

The best part? Wooden toys are incredibly versatile. You can create simple, classic designs like rocking horses and pull toys, or delve into more intricate projects like miniature dollhouses and intricate puzzles. The possibilities are truly endless, allowing you to express your personal style and cater to a wide range of tastes.

Why Wooden Toys are Perfect for Gift Shops and Craft Fairs

Wooden toys offer several advantages that make them highly desirable for both sellers and buyers:

  • Uniqueness: Handmade wooden toys stand out from the mass-produced plastic toys found in most stores, offering a unique and special touch.
  • Durability: Made from natural, sturdy materials, wooden toys can withstand the rigors of playtime and last for generations.
  • Sustainability: Wooden toys promote environmental consciousness by using renewable resources and reducing plastic waste.
  • Creativity: Wooden toys often encourage open-ended play, allowing children to use their imaginations and develop their creative skills.
  • Appeal: The natural beauty and handcrafted quality of wooden toys attract a broad range of customers, from parents seeking timeless toys to collectors looking for unique pieces.

DIY Wooden Toy Project Ideas

Get your creative juices flowing with these inspiring wooden toy project ideas that are sure to be crowd-pleasers:

Classic Wooden Toys

  • Rocking Horse: A timeless classic that brings joy to children of all ages. You can customize the design with different paint colors, patterns, and even add a saddle for extra fun.
  • Pull Toy: Simple yet engaging, pull toys encourage crawling and walking while providing hours of entertainment. Consider adding wheels, colorful patterns, and even a small character to the toy.
  • Wooden Blocks: These versatile building blocks can be used for endless imaginative play. You can create different shapes, sizes, and even add letters and numbers to enhance learning.
  • Wooden Puzzles: A challenging yet rewarding activity, wooden puzzles help develop problem-solving skills. You can create simple shape puzzles or more complex picture puzzles for older children.

Imaginative Wooden Toys

  • Miniature Dollhouse: Bring a child's imagination to life with a charming dollhouse. You can create a simple structure or add intricate details like furniture, wallpaper, and accessories.
  • Wooden Train Set: A classic for a reason, wooden train sets offer endless possibilities for storytelling and creative play. You can create tracks, stations, tunnels, and even add miniature people and animals.
  • Wooden Play Kitchen: Encourage imaginative play with a cute and functional wooden play kitchen. You can create a simple stovetop or include a full kitchen set with cabinets, a sink, and even a refrigerator.
  • Wooden Carving Toys: These simple toys are perfect for toddlers, encouraging them to explore their creativity and motor skills. You can create simple shapes like animals, vehicles, or letters.

Tips for Success

Here are some helpful tips for creating successful wooden toy projects:

  • Choose the Right Wood: Select wood that is durable, smooth, and safe for children. Popular options include maple, cherry, and pine.
  • Pay Attention to Safety: Ensure all sharp edges are sanded smooth, and avoid using paints or finishes that contain harmful chemicals.
  • Get Creative with Paint and Finishes: Use non-toxic paints and finishes to add color and detail to your toys. You can also try natural stains or waxes for a more rustic look.
  • Consider Packaging: Present your toys in attractive and eco-friendly packaging to enhance their appeal. You can use kraft paper, burlap, or recycled materials.
  • Pricing Strategically: Set realistic prices for your toys, considering your materials, time investment, and the market value of similar products.
  • Promote Your Products: Take high-quality photographs of your toys and share them online and through social media. Participate in craft fairs and market events to reach a wider audience.

With a little effort and creativity, you can turn your woodworking skills into a thriving business selling delightful wooden toys. These handmade treasures are sure to bring joy and wonder to children and adults alike, making them a perfect addition to any gift shop or craft fair.

Read More..

Quick and Easy Wood Projects for Extra Income

Quick and Easy Wood Projects for Extra Income

Quick and Easy Wood Projects for Extra Income

In today's economic climate, many people are looking for ways to supplement their income. One option that is both enjoyable and potentially profitable is crafting and selling wooden items. With the right skills and a little creativity, you can turn your passion for woodworking into a lucrative side hustle. This article will guide you through some quick and easy wood projects that are perfect for beginners and can bring in extra cash.

Identify Your Target Market

Before diving into specific projects, it's crucial to understand your target market. Consider who might be interested in your creations and what their preferences are. This will help you narrow down project ideas and tailor your offerings to their tastes. For example, if you live near a coastal community, you might create beach-themed items like driftwood ornaments or personalized cutting boards. Alternatively, if you are located in a city with a vibrant arts scene, you might offer modern, minimalist pieces such as coasters or decorative boxes.

Simple and Profitable Wood Projects

Cutting Boards

Cutting boards are a staple in any kitchen and are always in demand. They are relatively simple to make, requiring basic woodworking skills and readily available materials. You can use various woods, such as maple, cherry, or walnut, to create unique and visually appealing cutting boards. Adding a decorative element, like an engraved design or a personalized inscription, can increase their value.

Coasters

Coasters are another excellent entry-level project that can be produced quickly and efficiently. They require small pieces of wood, making them an excellent way to utilize scraps. Get creative with the shapes, sizes, and finishes. You can even add a decorative element like a resin inlay or a burned design to elevate their appeal.

Wooden Signs

Wooden signs are versatile and can be customized to fit a wide range of themes. You can create decorative signs for home decor, personalized signs for special occasions like weddings or housewarmings, or even functional signs for businesses or gardens. The possibilities are endless, allowing you to cater to a diverse customer base.

Birdhouses

Birdhouses are a classic woodworking project that always holds appeal. You can create simple and functional birdhouses or elaborate and detailed designs. Offer them in a variety of sizes and colors, and consider incorporating different materials, like metal or ceramic accents. Adding a unique touch can attract customers looking for something special.

Jewelry Boxes

Jewelry boxes are a popular choice for both personal use and as gifts. You can create small, delicate boxes for earrings or necklaces or larger boxes for watches or bracelets. Incorporate different wood species, stains, and finishes to offer a variety of options to your customers. Adding a decorative hinge or a custom-designed lock can increase the value and appeal of your jewelry boxes.

Decorative Boxes

Similar to jewelry boxes, decorative boxes can be used for various purposes, from storing small trinkets to holding tea bags or craft supplies. Experiment with different shapes, sizes, and finishes to create unique and eye-catching pieces. Adding a decorative lid or incorporating a personalized inscription can make your boxes even more desirable.

Picture Frames

Picture frames are a classic woodworking project that is always in demand. You can create simple and modern frames or more intricate and ornate designs. Offer different sizes and materials, and consider adding decorative elements like metal accents or engraved details. Personalized picture frames are a popular choice for gifts.

Wooden Toys

Wooden toys are becoming increasingly popular, offering a natural and eco-friendly alternative to plastic toys. You can create simple toys like puzzles or blocks, or more elaborate toys like toy cars or dolls. Consider using non-toxic paints and finishes to ensure safety for children. Wooden toys can be a profitable niche, especially with the growing trend towards sustainable products.

Tips for Success

Once you've chosen your projects, there are several steps you can take to increase your chances of success.

Develop Your Skills

While these projects are relatively easy, you'll need to develop basic woodworking skills. Take online courses, attend workshops, or learn from a seasoned woodworker to gain the necessary knowledge and experience. Practice your techniques to ensure you can produce high-quality, professional-looking products.

Source Your Materials

Find reliable sources for your wood and other materials. Consider local lumberyards, online suppliers, or even salvage yards for affordable options. Ensure you have access to the necessary tools, including saws, drills, sanders, and finishing supplies.

Market Your Products

Creating beautiful wooden items is only half the battle. You need to effectively market your products to reach potential customers. Set up an online shop on platforms like Etsy, Shopify, or Amazon Handmade. Participate in craft fairs and markets to showcase your work and connect with buyers in person. Utilize social media platforms to promote your creations and build a following.

Set Competitive Prices

Research the prices of similar wooden items in your market. Factor in the cost of materials, time spent on production, and any overhead expenses. Set prices that are competitive but also reflect the value and craftsmanship of your products. You can offer discounts for bulk orders or special promotions to attract customers.

Provide Excellent Customer Service

Delivering exceptional customer service is crucial for building a loyal customer base. Respond promptly to inquiries, package your items securely, and offer a satisfaction guarantee. Go the extra mile to ensure your customers are happy with their purchases, and they'll be more likely to return for future orders and recommend your products to others.

Final Thoughts

Crafting and selling wooden items can be a fulfilling and profitable side hustle. With creativity, dedication, and a commitment to providing quality products and excellent customer service, you can turn your woodworking hobby into a source of extra income. Remember to start small, focus on what you enjoy, and always strive to improve your skills and expand your offerings. As you gain experience and build your customer base, you'll be on your way to creating a thriving woodworking business.

Read More..

Wooden Nativity Scene: A Special Christmas Project

Wooden Nativity Scene: A Special Christmas Project

A Wooden Nativity Scene: A Special Christmas Project

The holidays are a time for family, friends, and creating cherished memories. What better way to celebrate the season than by embarking on a heartwarming and creative project: building a wooden nativity scene. This project offers a unique opportunity to blend traditional craftsmanship with the spirit of Christmas, resulting in a treasured heirloom for years to come.

Gathering Your Materials

Start by gathering the necessary materials. You'll need wood, preferably softwood like pine or basswood, as they are easy to work with. A jigsaw, sandpaper, wood glue, and paint are essential. For added detail, consider using acrylic paint, glitter glue, or even fabric scraps for clothing. Choose a design for your nativity scene. You can find templates online or sketch your own. This will help you determine the size of each piece and ensure that they fit together seamlessly.

Crafting the Characters

Once you have your materials ready, it's time to bring your characters to life. Using your design as a guide, cut out the shapes for each figure from the wood. Pay attention to detail, ensuring the figures have distinct features and expressions. Smooth any rough edges with sandpaper for a polished finish. If you're feeling ambitious, consider adding intricate details to each piece, such as sculpted hair or clothing folds, using carving tools.

Bringing the Scene to Life

With all the figures ready, start assembling the scene. Use wood glue to attach the characters to a sturdy base made from plywood. Arrange them in a meaningful and visually appealing composition. Add elements like a stable, a manger, and a star to create a complete and festive setting. Once the glue dries, it's time to paint your creation.

Adding Color and Detail

The painting process is a chance to truly personalize your nativity scene. Choose colors that reflect the traditional Christmas spirit, such as earthy tones for the stable, warm browns for the characters, and a brilliant gold for the star. Add details like shadows and highlights to create depth and dimension. You can even use different paint textures, such as glitter glue for the star or fabric scraps for clothing, to create unique effects.

A Gift from the Heart

As you work on your wooden nativity scene, you'll find yourself reflecting on the true meaning of Christmas. This project becomes more than just a craft; it becomes a heartfelt expression of love and faith. When finished, it will be a special heirloom that you can pass down through generations, reminding them of the joy and warmth of the holiday season.

A wooden nativity scene is a unique and meaningful project that captures the spirit of Christmas. It's a chance to create a cherished keepsake, celebrate tradition, and share the joy of the season with loved ones.

Read More..

Stylish Wooden Lawn Chairs with Built-In Cupholders for Added Convenience

Stylish Wooden Lawn Chairs with Built-In Cupholders for Added Convenience

Stylish Wooden Lawn Chairs with Built-In Cupholders for Added Convenience

Elevate your outdoor living experience with the timeless elegance and practicality of stylish wooden lawn chairs featuring built-in cupholders. These chairs seamlessly blend form and function, providing a comfortable seating solution while keeping your beverages within easy reach. From classic designs to contemporary interpretations, wooden lawn chairs with cupholders offer a versatile and aesthetically pleasing option for any outdoor space.

The Appeal of Wooden Lawn Chairs

Wooden lawn chairs have long been a staple in outdoor settings, exuding a sense of warmth, durability, and natural beauty. Their inherent strength and resilience make them ideal for withstanding the elements, while their timeless appeal complements a wide range of outdoor styles.

Durability and Longevity

Crafted from high-quality hardwoods, wooden lawn chairs are built to last. Their sturdy construction can withstand the rigors of frequent use, ensuring years of enjoyment. With proper care and maintenance, these chairs can become cherished family heirlooms, passed down through generations.

Natural Beauty and Versatility

The natural grain patterns and warm hues of wood add a touch of elegance and sophistication to any outdoor space. Wooden chairs seamlessly blend with surrounding greenery, creating a harmonious and inviting atmosphere. Their versatility allows them to complement various styles, from traditional to modern.

The Convenience of Built-In Cupholders

Built-in cupholders revolutionize the outdoor seating experience, eliminating the need for separate tables or trays to hold your drinks. This thoughtful design detail adds a touch of practicality and convenience, ensuring your beverages are always within easy reach.

Enhanced Comfort and Relaxation

With your drinks securely in place, you can fully relax and enjoy your surroundings without having to worry about spills or reaching for your beverage. This feature allows you to truly unwind and savor the moment.

Increased Functionality and Versatility

Built-in cupholders transform wooden lawn chairs into multi-functional pieces of furniture, making them suitable for a wide range of activities. Whether you're hosting a backyard barbecue, reading a book in the garden, or simply enjoying the sunset, these chairs provide both comfort and practicality.

Styles and Designs of Wooden Lawn Chairs with Cupholders

Wooden lawn chairs with cupholders come in a wide array of styles and designs, catering to diverse aesthetic preferences and outdoor settings.

Classic and Traditional

For a timeless look, consider classic wooden lawn chairs with traditional designs. These chairs often feature intricate carvings, sturdy construction, and a comfortable, slightly reclined back. The cupholders are typically integrated into the arms of the chairs, maintaining a cohesive and elegant aesthetic.

Contemporary and Modern

For a more contemporary feel, opt for modern wooden lawn chairs with sleek lines and minimalist designs. These chairs often feature clean, geometric shapes and may incorporate innovative materials or finishes. The cupholders may be integrated into the frame of the chair or positioned on the arms, offering a subtle yet functional touch.

Rustic and Farmhouse

For a rustic and farmhouse aesthetic, choose wooden lawn chairs with a distressed or weathered finish. These chairs often feature natural wood tones and may incorporate rustic elements like rope accents or metal hardware. The cupholders can add to the rustic charm, offering a practical yet visually appealing detail.

Choosing the Right Wooden Lawn Chairs with Cupholders

When selecting wooden lawn chairs with cupholders, consider the following factors to ensure you make the best choice for your needs and preferences.

Comfort and Ergonomics

Choose chairs with comfortable seating, providing adequate support for your back and posture. Consider the width of the seat, the height of the back, and the overall ergonomics of the chair to ensure it meets your comfort requirements.

Materials and Construction

Opt for high-quality hardwoods known for their durability and resilience, such as teak, cedar, or oak. Ensure the construction is sturdy and the joints are well-secured to guarantee longevity and stability.

Style and Design

Choose a style that complements the overall aesthetic of your outdoor space and reflects your personal taste. Consider the existing furniture, decor, and landscaping elements when making your selection.

Cupholder Placement and Functionality

Evaluate the placement and functionality of the cupholders. Ensure they are securely mounted, accessible, and suitable for the types of beverages you plan to use. Consider the size and shape of the cupholders to accommodate various drink containers.

Caring for Your Wooden Lawn Chairs

Proper care and maintenance are essential to preserve the beauty and longevity of your wooden lawn chairs.

Regular Cleaning

Regularly clean your chairs with a soft brush or cloth to remove dirt, dust, and debris. Avoid using harsh chemicals or abrasive cleaners that can damage the wood.

Sealing and Protection

Apply a sealant or protective finish to the wood to help repel moisture, prevent stains, and protect against the elements. Choose a sealant specifically designed for outdoor furniture and follow the manufacturer's instructions.

Storage and Protection

During the off-season, store your chairs indoors or under a cover to protect them from rain, snow, and extreme temperatures. Consider using a furniture cover specifically designed for wooden chairs to shield them from the elements.

Conclusion

Stylish wooden lawn chairs with built-in cupholders combine the timeless appeal of natural wood with the convenience of practical design features. They offer a comfortable and functional seating solution for any outdoor space, enhancing relaxation and enjoyment while ensuring your beverages are always within easy reach. By considering factors such as comfort, materials, style, and functionality, you can select the perfect wooden lawn chairs with cupholders to elevate your outdoor living experience.

Read More..

How to build a grill gazebo with a sturdy, low-maintenance frame

How to build a grill gazebo with a sturdy, low-maintenance frame

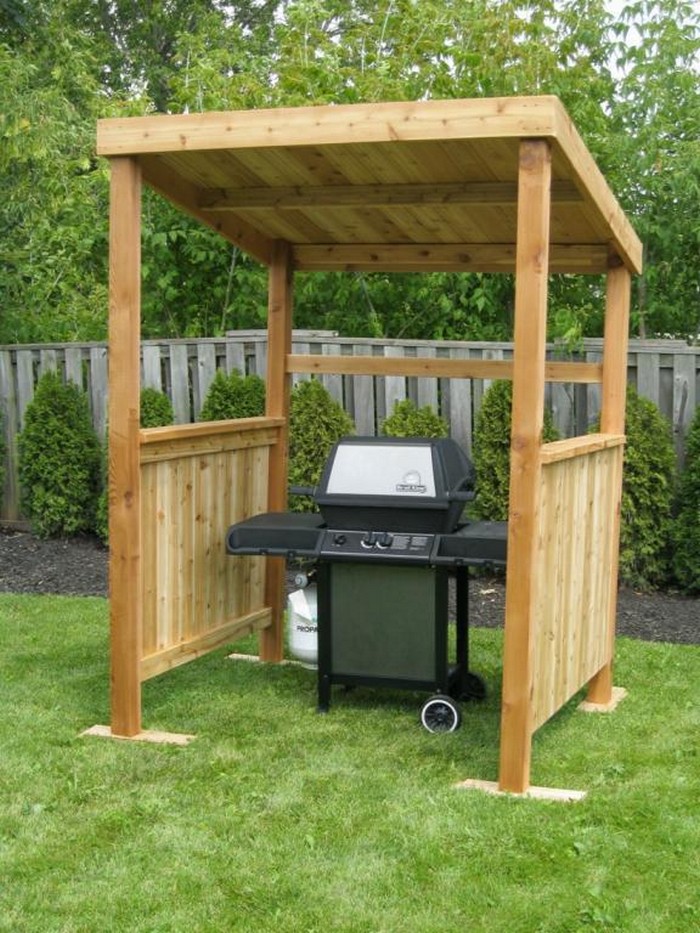
Building a Sturdy and Low-Maintenance Grill Gazebo

Alright, grill masters and backyard enthusiasts, let's talk about taking your grilling game to the next level! What could be better than a dedicated space for your grill, protected from the elements and looking sharp? That's right, we're talking about building a grill gazebo. But hold on, we're not just going for any old flimsy structure here. We're aiming for a sturdy, low-maintenance masterpiece that will stand the test of time (and maybe a few summer storms).

Building a gazebo might seem like a daunting task, but trust me, it's totally doable with a little planning and elbow grease. Let's break it down step-by-step, shall we?

Planning is Key: Setting the Stage for Your Grill Gazebo

Before we dive into the construction, let's get our ducks in a row. Here's what we need to consider:

1. The Perfect Location

First things first, pick the prime spot for your gazebo. Think about where the sun shines throughout the day, any existing obstacles, and the overall flow of your backyard. You'll want easy access to your grill, a comfortable seating area, and hopefully, a view to boot.

2. Size Matters

Now, measure that spot! You need to decide on the size of your gazebo, taking into account your grill, seating area, and any other things you want to fit under the canopy. Remember, you need enough room to move around comfortably.

3. Material Decisions: The Foundation of Your Structure

This is where the "low-maintenance" part comes in. You want materials that will hold up to the elements and not require constant upkeep. Here are some popular options:

  • Aluminum: Lightweight, corrosion-resistant, and easy to work with. A good choice for a DIYer!
  • Vinyl-Coated Steel: Strong, durable, and can be found in various colors and styles. It's a great option if you want a more traditional look.
  • Wood: Adds a rustic touch, but needs regular maintenance like staining and sealing. If you go this route, make sure to choose pressure-treated lumber for longevity.

Think about your budget, desired style, and maintenance level when making this decision. We'll dive deeper into the pros and cons of each material later on.

4. Roof Style: Shelter from the Elements

Time to choose a roof! Here are the most common choices:

  • Gable Roof: Classic, sturdy, and efficient for shedding water.
  • Hip Roof: Offers more stability and a sleek, modern look.
  • Flat Roof: A budget-friendly option, but requires a slight pitch for drainage.

Consider factors like snowfall in your area and the overall style of your home when making your choice.

Getting Down to Business: Building Your Grill Gazebo

Now for the fun part! Let's get those tools ready and start building.

1. Laying the Foundation: A Solid Base for Your Gazebo

Start by preparing the ground where your gazebo will stand. You can use a concrete pad, gravel bed, or even a wooden deck, depending on your preference and local building codes. Ensure a level foundation to avoid any future problems with your gazebo.

2. Building the Frame: The Backbone of Your Structure

This is where the real work begins. Here's a general guideline, assuming you're using metal framing, but remember to consult the manufacturer's instructions if you choose a different material.

  • Assemble the Columns: Start by attaching the base plates to the foundation. Then, connect the columns to the base plates using the supplied fasteners.
  • Connect the Rafters: Cut and attach the rafters to the columns, forming the framework for your roof. Make sure they are securely fastened with the proper fasteners.
  • Install the Wall Panels: Connect the pre-fabricated wall panels to the columns, creating the enclosed space for your gazebo.

3. Covering the Roof: Protection from the Elements

There are various roofing materials available, each with its own pros and cons. Here's a breakdown:

  • Metal Roofing: Durable, long-lasting, and easy to maintain. It also comes in various colors and styles.
  • Shingles: A classic and budget-friendly choice. However, they may require more maintenance than metal roofing.
  • Canvas: Provides shade and ventilation. It's a great option for a more casual, open-air feel, but it requires regular cleaning and replacement.

Choose the roofing material that best suits your needs and budget. Follow the manufacturer's instructions for installation.

4. Adding Finishing Touches: Making Your Grill Gazebo Shine

Now comes the fun part: adding the finishing touches! Here's what you can do:

  • Install Screens or Curtains: Enjoy the outdoors while keeping bugs at bay.
  • Add a Lighting System: Extend your grilling enjoyment into the evenings with some stylish lights.
  • Decorate Your Gazebo: Hang plants, add a cozy rug, or personalize the space with your favorite decor.

Let your creativity run wild and make this your ultimate grilling oasis!

Choosing the Right Materials: A Closer Look

Now that we've got the basics down, let's dive a little deeper into the materials you can use for your grill gazebo. Remember, we're aiming for sturdy and low-maintenance, so let's compare the options:

1. Aluminum: Lightweight and Low-Maintenance

  • Pros: Lightweight, corrosion-resistant, easy to work with, and comes in various styles.
  • Cons: Can be more expensive than other options.

If you're looking for a strong and durable gazebo that's relatively easy to build, aluminum is a great choice. It's perfect for those who want a long-lasting structure with minimal maintenance.

2. Vinyl-Coated Steel: Durable and Stylish

  • Pros: Strong, durable, and comes in various colors and styles. It's also relatively affordable.
  • Cons: Can be heavy to work with, and may require some regular cleaning to maintain its appearance.

Vinyl-coated steel is a great option if you want a gazebo that's both sturdy and stylish. It's a popular choice for those who want a more traditional look.

3. Wood: The Rustic Charm

  • Pros: Adds a rustic charm and can be customized with various stains and finishes.
  • Cons: Requires regular maintenance, including staining, sealing, and possibly treating for insects and rot. Can be more expensive than other materials.

Wood is a classic choice for outdoor structures, and it can create a warm and inviting feel. However, you need to be prepared for the ongoing maintenance that comes with it. If you're not afraid of a little work, wood can be a great option.

Safety First: Important Considerations

Building a gazebo involves working with tools and heavy materials. Safety should always be your top priority! Here are some key considerations:

  • Use the Right Tools and Equipment: Ensure your tools are in good working condition, and use the appropriate safety gear, such as gloves, goggles, and a dust mask.
  • Follow Building Codes: Check with your local building department for any permits or regulations that apply to your gazebo.
  • Get Help if Needed: If you're not comfortable with certain aspects of the construction, don't hesitate to ask for help from a friend or professional.
  • Inspect Your Work Regularly: Once your gazebo is built, check for any loose or damaged components regularly and address any issues promptly.

Remember, safety is paramount! By taking the necessary precautions, you can ensure a safe and enjoyable building experience.

Your Grill Gazebo: A Backyard Oasis

And there you have it! By following these steps and choosing the right materials, you can build a sturdy and low-maintenance grill gazebo that will become your favorite backyard gathering spot. Now, go out there and let your creativity shine! Enjoy those summer cookouts in style.

Read More..

The Best Wood Types for DIY Bedside Cabinets

The Best Wood Types for DIY Bedside Cabinets

The Best Wood Types for DIY Bedside Cabinets: A Guide to Building Your Dream Nightstand

So, you've decided to tackle a DIY project and build your own bedside cabinets. That's awesome! Not only will you save money, but you'll also have the satisfaction of creating something unique and personal. But with so many wood types out there, it can be overwhelming to choose the right one for your project. Don't worry, we've got you covered! This comprehensive guide will walk you through some of the best wood types for bedside cabinets, highlighting their pros and cons, and helping you make the best choice for your needs.

Whether you're a seasoned woodworker or a newbie just starting out, this guide will help you choose the perfect wood for your DIY bedside cabinets, ensuring your project turns out beautifully and stands the test of time.

Factors to Consider When Choosing Wood

Before we dive into specific wood types, let's talk about some key factors that will influence your decision:

Style and Aesthetic

Think about the overall look and feel you want for your bedside cabinets. Are you going for a rustic, modern, minimalist, or traditional style? The wood's grain pattern, color, and texture will play a significant role in achieving your desired aesthetic.

Durability and Strength

Bedside cabinets need to be sturdy enough to hold your books, lamps, and other essentials. Consider the weight they will be supporting and choose a wood that's known for its durability and strength. You don't want your nightstand to wobble or sag over time!

Workability

How comfortable are you working with different wood types? Some woods are harder to cut, sand, and finish than others. If you're a beginner, it's wise to choose a wood that's known for being forgiving and easy to work with.

Budget

Wood prices can vary widely, so it's essential to consider your budget. Some exotic hardwoods can be quite expensive, while others are more affordable. Don't be afraid to explore different options and find a wood that fits your price range.

Best Wood Types for DIY Bedside Cabinets

Now, let's get into the nitty-gritty and discuss some of the best wood types for bedside cabinets:

Oak

Oak is a classic choice for furniture due to its strength, durability, and beautiful grain pattern. It comes in various shades, from warm honey to rich brown, and can be stained to match any decor. Oak is also relatively easy to work with, making it suitable for both beginners and experienced woodworkers.

Pros:

  • Strong and durable
  • Beautiful grain pattern
  • Available in various shades
  • Relatively easy to work with
  • Cons:

  • Can be expensive, especially for higher-grade oak
  • Maple

    Maple is another excellent option for bedside cabinets. It's known for its hardness, smooth texture, and stunning grain pattern. Maple can range from creamy white to reddish brown, offering versatility in style. It's also relatively easy to work with and finishes beautifully.

    Pros:

  • Hard and durable
  • Smooth texture
  • Beautiful grain pattern
  • Easy to work with
  • Cons:

  • Can be prone to scratches and dents
  • Cherry

    Cherry wood is a favorite among woodworkers for its rich reddish-brown color, beautiful grain pattern, and warm, inviting feel. It's a harder wood, making it durable enough for everyday use. Cherry also has a pleasant aroma and ages gracefully, becoming darker and richer over time.

    Pros:

  • Rich reddish-brown color
  • Beautiful grain pattern
  • Durable and hard
  • Ages gracefully
  • Cons:

  • Can be expensive
  • Walnut

    Walnut is a luxurious wood known for its rich chocolate brown color, intricate grain pattern, and unique character. It's a strong and durable wood that's easy to work with and finishes beautifully. Walnut's beauty and elegance make it a popular choice for high-end furniture.

    Pros:

  • Rich chocolate brown color
  • Intricate grain pattern
  • Strong and durable
  • Easy to work with
  • Cons:

  • Can be expensive
  • Pine

    Pine is a softwood that's known for its affordability, light color, and distinctive knots. It's a forgiving wood that's easy to work with, making it ideal for beginners. Pine is often used for rustic furniture and can be stained or painted to create various styles.

    Pros:

  • Affordable
  • Light color
  • Easy to work with
  • Cons:

  • Soft and prone to dents and scratches
  • May require extra care to prevent warping
  • Birch

    Birch is a durable and versatile hardwood that's available in various grades. It has a light, creamy color and a fine, consistent grain pattern. Birch is easy to work with and finishes beautifully, making it a popular choice for furniture.

    Pros:

  • Durable and versatile
  • Light, creamy color
  • Fine and consistent grain pattern
  • Easy to work with
  • Cons:

  • Can be prone to scratches and dents
  • Plywood

    While not a solid wood, plywood is an excellent and budget-friendly alternative for bedside cabinets. It's made of thin layers of wood veneer glued together, creating a strong and stable material. Plywood is available in various wood types and finishes, offering versatility in style.

    Pros:

  • Affordable
  • Strong and stable
  • Available in various wood types and finishes
  • Cons:

  • May not have the same visual appeal as solid wood
  • Tips for Choosing the Right Wood for Your Project

    Now that you have a better understanding of different wood types, here are some additional tips to help you choose the right one for your bedside cabinets:

  • Consider the overall style of your bedroom. Do you want a rustic, modern, or traditional look? The wood you choose should complement your existing decor.
  • Think about how you plan to use your bedside cabinets. Will they be holding heavy books, lamps, or other items? Choose a wood that's strong and durable enough for your needs.
  • Don't be afraid to experiment. If you're unsure about a particular wood, consider purchasing a small sample piece to get a feel for it before committing to a larger quantity.
  • Visit a local lumberyard or woodworking store. They can offer valuable advice and help you choose the right wood for your project.
  • Factor in the cost of finishing. Some woods require more extensive finishing than others. Consider this when budgeting for your project.
  • Building your own bedside cabinets can be a rewarding and enjoyable experience. Choosing the right wood is crucial for achieving a beautiful and functional piece of furniture. By considering the factors discussed above and exploring the various wood types available, you'll be well on your way to creating a custom nightstand that perfectly complements your style and needs.

    Read More..

    Diy grill gazebo ideas for your backyard cooking area

    Diy grill gazebo ideas for your backyard cooking area

    DIY Grill Gazebo Ideas for Your Backyard Cooking Area

    A grill gazebo is an excellent way to enhance your backyard cooking experience, providing shelter from the elements and creating a dedicated space for grilling and entertaining. Building a DIY grill gazebo allows you to customize it to your needs and style, making it a unique and functional addition to your outdoor living area. This article will explore various DIY grill gazebo ideas to inspire your next backyard project.

    Choosing the Right Design and Materials

    Before diving into construction, consider the design and materials for your grill gazebo. These factors will influence the overall look, functionality, and durability of your structure.

    Design Considerations

    • Size and Shape: Determine the size needed to accommodate your grill, seating, and any additional features you want to include. Popular shapes include square, rectangular, hexagonal, and octagonal.
    • Roof Style: Options include a flat roof, gable roof, or a more elaborate hip roof. Consider the amount of rainfall in your area and choose a roof style that provides adequate drainage.
    • Enclosure Type: Decide whether you want a fully enclosed gazebo for privacy or a more open structure with screens or curtains for partial shade.
    • Materials: Popular choices include wood, metal, and vinyl. Wood offers a natural aesthetic and versatility, while metal is durable and requires less maintenance. Vinyl is a low-maintenance option that's resistant to weather damage.

    Material Selection

    • Wood: Consider pressure-treated lumber for the frame and posts to resist rot and insect damage. Redwood or cedar are durable and weather-resistant options. Use cedar or redwood for the roof if you want a natural look.
    • Metal: Aluminum is a lightweight and corrosion-resistant metal suitable for framing and roofing. Steel provides greater strength but requires proper rust prevention.
    • Vinyl: Vinyl framing and roofing offer low maintenance and durability. They're available in various colors and styles to match your home's aesthetics.

    Simple DIY Grill Gazebo Ideas

    Here are some easy-to-build DIY grill gazebo ideas to get you started:

    A-Frame Gazebo

    An A-frame gazebo is a straightforward design that requires basic carpentry skills. It involves constructing two triangular frames, connecting them at the top, and attaching a roof to the frame. You can create a simple A-frame gazebo using 2x4 lumber for the frame and plywood for the roof. Add a few side panels for partial shade, and you'll have a functional and stylish grill gazebo.

    Rectangular Gazebo with Fabric Canopy

    A rectangular gazebo with a fabric canopy is an easy and affordable option. You can create a frame using 4x4 posts and 2x4 lumber for the beams. The fabric canopy can be made from a waterproof canvas or tarp. Secure the canopy to the frame using rope or straps. This type of gazebo offers good shade and can be easily customized with different fabrics and decorations.

    Metal Gazebo with Removable Roof

    If you prefer a more modern and minimalist look, a metal gazebo with a removable roof is an excellent option. Metal framing is available in pre-cut kits, making assembly easier. You can choose a roof made of metal panels, polycarbonate sheets, or even a retractable awning. The removable roof allows you to enjoy open-air grilling on sunny days.

    Adding Features and Customization

    Once you've built the basic structure, you can add various features to enhance your grill gazebo's functionality and style.

    Lighting

    • LED Lights: Install LED strip lights under the roof overhang for ambient lighting. They're energy-efficient and provide a warm, inviting glow.
    • Pendant Lights: Hang stylish pendant lights from the roof beams to add a touch of elegance.
    • String Lights: String lights add a festive touch and create a cozy atmosphere.

    Storage

    • Shelves: Install shelves on the sides of the gazebo for storing grilling tools, spices, and other essentials.
    • Cabinets: Add cabinets under the counter for storing larger items like propane tanks or charcoal.
    • Hooks: Install hooks on the walls for hanging grilling tools and utensils.

    Seating

    • Built-in Seating: Include a built-in bench or a small table with stools for a more permanent seating area.
    • Outdoor Furniture: Add chairs, a table, or a sofa to create a comfortable and inviting space for dining and socializing.

    Finishing Touches

    • Paint or Stain: Add a touch of color and personality with paint or stain. You can choose a color that complements your home's exterior or create a bold statement with a contrasting hue.
    • Decorative Elements: Personalize your gazebo with decorative elements like potted plants, hanging baskets, wind chimes, or artwork.

    Safety Tips

    Safety should always be a top priority when building a grill gazebo. Here are some important considerations:

    • Fire Safety: Ensure adequate ventilation and place the grill a safe distance from combustible materials. Install a fire extinguisher nearby.
    • Electrical Safety: Use weatherproof wiring and outlets for any electrical devices you'll be using in the gazebo.
    • Structural Stability: Securely anchor the gazebo to the ground to prevent it from collapsing in strong winds.

    Conclusion

    Building a DIY grill gazebo is a rewarding project that enhances your backyard cooking area. With a little planning and effort, you can create a custom space that's perfect for grilling, entertaining, and enjoying the outdoors. From simple A-frame designs to more elaborate metal structures, there are endless possibilities for creating a unique and functional grill gazebo that meets your needs and style.

    Read More..

    Beginner's Guide to Crafting a Simple Squirrel Box

    Beginner's Guide to Crafting a Simple Squirrel Box

    Beginner's Guide to Crafting a Simple Squirrel Box

    Inviting squirrels to your backyard can be a delightful experience, providing endless entertainment as they scamper and play. A squirrel box, also known as a squirrel feeder or nesting box, offers a safe and cozy space for them to rest, store food, and even raise their young. This guide will walk you through the simple steps of building your own squirrel box, a rewarding project that requires minimal tools and skills.

    Materials You'll Need

    Before you start, gather the following materials:

    • Wood: Choose a rot-resistant wood like cedar, redwood, or pressure-treated lumber. You'll need a piece for the base, sides, back, and roof.
    • Screws: Use screws that are long enough to secure the wood pieces firmly.
    • Saw: A hand saw or circular saw for cutting the wood.
    • Drill: For pre-drilling holes to prevent splitting the wood.
    • Measuring Tape: For accurate dimensions.
    • Pencil: For marking cuts and measurements.
    • Hammer: If you're using nails instead of screws.
    • Sandpaper: To smooth out any rough edges.
    • Paint or Stain (Optional): For a decorative touch and added weather protection.

    Building the Squirrel Box

    1. Cut the Wood

    Using your saw and measuring tape, cut the wood into the following pieces:

    • Base: 12 inches by 12 inches
    • Sides: Two pieces, 12 inches by 6 inches
    • Back: 12 inches by 6 inches
    • Roof: 14 inches by 14 inches

    2. Assemble the Box

    Follow these steps to assemble the box:

    1. Attach the two side pieces to the base, using screws or nails. Ensure the sides are positioned upright.
    2. Attach the back piece to the base and sides, forming the back of the box.
    3. Pre-drill holes through the roof and base before attaching the roof. This will help prevent the wood from splitting. Secure the roof with screws or nails.
    4. For added stability, consider adding a small piece of wood to the front of the box as a ledge for the squirrels to perch on.

    3. Finishing Touches

    To finish your squirrel box:

    1. Sand down any rough edges to prevent splinters.
    2. If desired, apply a coat of paint or stain to protect the wood and add a decorative touch.
    3. Create an opening in the front of the box, about 3 inches wide and 4 inches high. This opening should be high enough to discourage predators and allow squirrels to enter easily.

    Installing the Squirrel Box

    Find a suitable location for your squirrel box:

    • Choose a spot that provides shade and protection from the elements.
    • Mount the box securely to a tree or post, at least 10 feet off the ground.
    • Make sure the box is facing away from prevailing winds.
    • Consider adding a squirrel feeder nearby to attract squirrels to the box.

    Enjoy Your New Squirrel Home

    Once your squirrel box is installed, sit back and enjoy watching the squirrels explore their new home. Remember to clean the box regularly to ensure a healthy and safe environment for your furry friends.

    Read More..