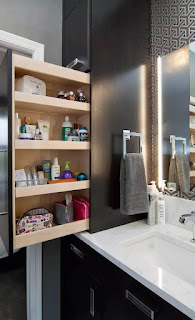
Unlock Your Storage Potential: Build Stunning DIY Wooden Shelves
Tired of cluttered bathrooms and overflowing storage spaces? Transform your home with the simple elegance and practicality of custom-built wooden shelves. This project, while seemingly daunting, is surprisingly achievable even for novice DIYers. We'll guide you through each step, from selecting the perfect wood to installing your gleaming new shelves, empowering you to create beautiful, functional storage solutions that perfectly match your style and needs.
Choosing Your Wood and Materials
The heart of any successful DIY project lies in material selection. For bathroom shelves, prioritize water-resistant wood like cedar or redwood, known for their natural resistance to moisture and rot. For general storage, options expand to include pine, oak, or even reclaimed wood for a rustic charm. Consider the aesthetic you're aiming for: a sleek modern look might call for smooth, stained wood, while a farmhouse style benefits from a more natural, possibly unfinished, finish. Beyond the wood, gather your essential tools: a measuring tape, level, saw (circular saw or hand saw, depending on your skill and the wood's thickness), drill, screwdriver, wood glue, screws, sandpaper (various grits), stain or paint (optional), and finishing sealant (essential for bathroom shelves).
Essential Tool Checklist
- Measuring Tape
- Level
- Saw (Circular or Hand Saw)
- Drill
- Screwdriver
- Wood Glue
- Screws (appropriate size and length)
- Sandpaper (various grits)
- Stain or Paint (optional)
- Finishing Sealant (especially for bathrooms)
Cutting and Assembling Your Shelves
Carefully measure your desired shelf dimensions and transfer these measurements to your chosen wood. Use a pencil to mark the cuts precisely. For clean, straight cuts, a circular saw is recommended, but a hand saw works perfectly well with patience and a steady hand. Remember to always prioritize safety: wear safety glasses and ensure proper ventilation when using power tools. Once you've cut all your pieces, use wood glue and screws to assemble the shelf units. Pre-drill pilot holes to prevent the wood from splitting, particularly with harder woods. Ensure all joints are square and secure for optimal stability.
Finishing Touches: Sanding, Staining, and Sealing
Once assembled, meticulously sand your shelves, starting with a coarser grit sandpaper to remove any rough edges, then gradually transitioning to finer grits for a smooth finish. This step is crucial for both aesthetics and ensuring a flawless application of any stain or paint. Apply your chosen stain or paint according to the manufacturer's instructions, allowing ample drying time between coats. Finally, seal your shelves with a water-resistant sealant, especially crucial for bathroom installations to protect the wood from moisture damage and mold growth. This step significantly extends the life of your shelves. Allow the sealant to dry completely before installation.
Installing Your Stunning New Shelves
Locate the studs in your wall using a stud finder to ensure secure and stable mounting. Mark the positions for your shelf brackets on the wall. Pre-drill pilot holes for the screws to avoid splitting the wall or the shelf brackets. Securely attach the brackets to the wall using appropriate screws. Carefully position your shelves onto the brackets, ensuring they are level. Admire your handiworkâ€" you've successfully transformed your space! With a little time and effort, you've created beautiful, functional shelves, perfectly tailored to your storage needs, adding both style and practicality to your home.


0 comments:
Post a Comment