Pages

DIY Wooden Toy Projects That Are Perfect for Gift Shops and Craft Fairs

DIY Wooden Toy Projects That Are Perfect for Gift Shops and Craft Fairs

DIY Wooden Toy Projects That Are Perfect for Gift Shops and Craft Fairs

Looking for a unique and profitable way to showcase your crafting skills? Handmade wooden toys are a timeless classic that always captures the hearts of children and adults alike. These charming creations are not only beautiful but also environmentally friendly, making them a perfect choice for eco-conscious shoppers. With a little creativity and some basic woodworking skills, you can craft a variety of wooden toys that will fly off the shelves at gift shops and craft fairs.

The best part? Wooden toys are incredibly versatile. You can create simple, classic designs like rocking horses and pull toys, or delve into more intricate projects like miniature dollhouses and intricate puzzles. The possibilities are truly endless, allowing you to express your personal style and cater to a wide range of tastes.

Why Wooden Toys are Perfect for Gift Shops and Craft Fairs

Wooden toys offer several advantages that make them highly desirable for both sellers and buyers:

  • Uniqueness: Handmade wooden toys stand out from the mass-produced plastic toys found in most stores, offering a unique and special touch.
  • Durability: Made from natural, sturdy materials, wooden toys can withstand the rigors of playtime and last for generations.
  • Sustainability: Wooden toys promote environmental consciousness by using renewable resources and reducing plastic waste.
  • Creativity: Wooden toys often encourage open-ended play, allowing children to use their imaginations and develop their creative skills.
  • Appeal: The natural beauty and handcrafted quality of wooden toys attract a broad range of customers, from parents seeking timeless toys to collectors looking for unique pieces.

DIY Wooden Toy Project Ideas

Get your creative juices flowing with these inspiring wooden toy project ideas that are sure to be crowd-pleasers:

Classic Wooden Toys

  • Rocking Horse: A timeless classic that brings joy to children of all ages. You can customize the design with different paint colors, patterns, and even add a saddle for extra fun.
  • Pull Toy: Simple yet engaging, pull toys encourage crawling and walking while providing hours of entertainment. Consider adding wheels, colorful patterns, and even a small character to the toy.
  • Wooden Blocks: These versatile building blocks can be used for endless imaginative play. You can create different shapes, sizes, and even add letters and numbers to enhance learning.
  • Wooden Puzzles: A challenging yet rewarding activity, wooden puzzles help develop problem-solving skills. You can create simple shape puzzles or more complex picture puzzles for older children.

Imaginative Wooden Toys

  • Miniature Dollhouse: Bring a child's imagination to life with a charming dollhouse. You can create a simple structure or add intricate details like furniture, wallpaper, and accessories.
  • Wooden Train Set: A classic for a reason, wooden train sets offer endless possibilities for storytelling and creative play. You can create tracks, stations, tunnels, and even add miniature people and animals.
  • Wooden Play Kitchen: Encourage imaginative play with a cute and functional wooden play kitchen. You can create a simple stovetop or include a full kitchen set with cabinets, a sink, and even a refrigerator.
  • Wooden Carving Toys: These simple toys are perfect for toddlers, encouraging them to explore their creativity and motor skills. You can create simple shapes like animals, vehicles, or letters.

Tips for Success

Here are some helpful tips for creating successful wooden toy projects:

  • Choose the Right Wood: Select wood that is durable, smooth, and safe for children. Popular options include maple, cherry, and pine.
  • Pay Attention to Safety: Ensure all sharp edges are sanded smooth, and avoid using paints or finishes that contain harmful chemicals.
  • Get Creative with Paint and Finishes: Use non-toxic paints and finishes to add color and detail to your toys. You can also try natural stains or waxes for a more rustic look.
  • Consider Packaging: Present your toys in attractive and eco-friendly packaging to enhance their appeal. You can use kraft paper, burlap, or recycled materials.
  • Pricing Strategically: Set realistic prices for your toys, considering your materials, time investment, and the market value of similar products.
  • Promote Your Products: Take high-quality photographs of your toys and share them online and through social media. Participate in craft fairs and market events to reach a wider audience.

With a little effort and creativity, you can turn your woodworking skills into a thriving business selling delightful wooden toys. These handmade treasures are sure to bring joy and wonder to children and adults alike, making them a perfect addition to any gift shop or craft fair.
Read More..

Quick and Easy Wood Projects for Extra Income

Quick and Easy Wood Projects for Extra Income

Quick and Easy Wood Projects for Extra Income

In today's economic climate, many people are looking for ways to supplement their income. One option that is both enjoyable and potentially profitable is crafting and selling wooden items. With the right skills and a little creativity, you can turn your passion for woodworking into a lucrative side hustle. This article will guide you through some quick and easy wood projects that are perfect for beginners and can bring in extra cash.

Identify Your Target Market

Before diving into specific projects, it's crucial to understand your target market. Consider who might be interested in your creations and what their preferences are. This will help you narrow down project ideas and tailor your offerings to their tastes. For example, if you live near a coastal community, you might create beach-themed items like driftwood ornaments or personalized cutting boards. Alternatively, if you are located in a city with a vibrant arts scene, you might offer modern, minimalist pieces such as coasters or decorative boxes.

Simple and Profitable Wood Projects

Cutting Boards

Cutting boards are a staple in any kitchen and are always in demand. They are relatively simple to make, requiring basic woodworking skills and readily available materials. You can use various woods, such as maple, cherry, or walnut, to create unique and visually appealing cutting boards. Adding a decorative element, like an engraved design or a personalized inscription, can increase their value.

Coasters

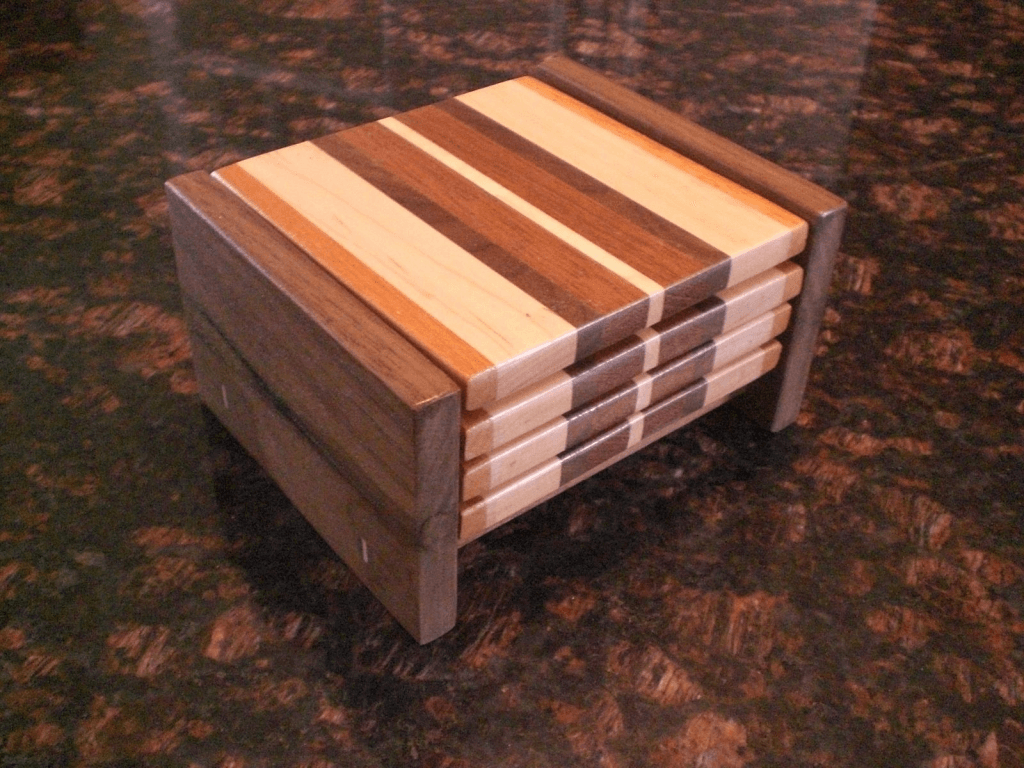
Coasters are another excellent entry-level project that can be produced quickly and efficiently. They require small pieces of wood, making them an excellent way to utilize scraps. Get creative with the shapes, sizes, and finishes. You can even add a decorative element like a resin inlay or a burned design to elevate their appeal.

Wooden Signs

Wooden signs are versatile and can be customized to fit a wide range of themes. You can create decorative signs for home decor, personalized signs for special occasions like weddings or housewarmings, or even functional signs for businesses or gardens. The possibilities are endless, allowing you to cater to a diverse customer base.

Birdhouses

Birdhouses are a classic woodworking project that always holds appeal. You can create simple and functional birdhouses or elaborate and detailed designs. Offer them in a variety of sizes and colors, and consider incorporating different materials, like metal or ceramic accents. Adding a unique touch can attract customers looking for something special.

Jewelry Boxes

Jewelry boxes are a popular choice for both personal use and as gifts. You can create small, delicate boxes for earrings or necklaces or larger boxes for watches or bracelets. Incorporate different wood species, stains, and finishes to offer a variety of options to your customers. Adding a decorative hinge or a custom-designed lock can increase the value and appeal of your jewelry boxes.

Decorative Boxes

Similar to jewelry boxes, decorative boxes can be used for various purposes, from storing small trinkets to holding tea bags or craft supplies. Experiment with different shapes, sizes, and finishes to create unique and eye-catching pieces. Adding a decorative lid or incorporating a personalized inscription can make your boxes even more desirable.

Picture Frames

Picture frames are a classic woodworking project that is always in demand. You can create simple and modern frames or more intricate and ornate designs. Offer different sizes and materials, and consider adding decorative elements like metal accents or engraved details. Personalized picture frames are a popular choice for gifts.

Wooden Toys

Wooden toys are becoming increasingly popular, offering a natural and eco-friendly alternative to plastic toys. You can create simple toys like puzzles or blocks, or more elaborate toys like toy cars or dolls. Consider using non-toxic paints and finishes to ensure safety for children. Wooden toys can be a profitable niche, especially with the growing trend towards sustainable products.

Tips for Success

Once you've chosen your projects, there are several steps you can take to increase your chances of success.

Develop Your Skills

While these projects are relatively easy, you'll need to develop basic woodworking skills. Take online courses, attend workshops, or learn from a seasoned woodworker to gain the necessary knowledge and experience. Practice your techniques to ensure you can produce high-quality, professional-looking products.

Source Your Materials

Find reliable sources for your wood and other materials. Consider local lumberyards, online suppliers, or even salvage yards for affordable options. Ensure you have access to the necessary tools, including saws, drills, sanders, and finishing supplies.

Market Your Products

Creating beautiful wooden items is only half the battle. You need to effectively market your products to reach potential customers. Set up an online shop on platforms like Etsy, Shopify, or Amazon Handmade. Participate in craft fairs and markets to showcase your work and connect with buyers in person. Utilize social media platforms to promote your creations and build a following.

Set Competitive Prices

Research the prices of similar wooden items in your market. Factor in the cost of materials, time spent on production, and any overhead expenses. Set prices that are competitive but also reflect the value and craftsmanship of your products. You can offer discounts for bulk orders or special promotions to attract customers.

Provide Excellent Customer Service

Delivering exceptional customer service is crucial for building a loyal customer base. Respond promptly to inquiries, package your items securely, and offer a satisfaction guarantee. Go the extra mile to ensure your customers are happy with their purchases, and they'll be more likely to return for future orders and recommend your products to others.

Final Thoughts

Crafting and selling wooden items can be a fulfilling and profitable side hustle. With creativity, dedication, and a commitment to providing quality products and excellent customer service, you can turn your woodworking hobby into a source of extra income. Remember to start small, focus on what you enjoy, and always strive to improve your skills and expand your offerings. As you gain experience and build your customer base, you'll be on your way to creating a thriving woodworking business.

Read More..

Wooden Nativity Scene: A Special Christmas Project

Wooden Nativity Scene: A Special Christmas Project

A Wooden Nativity Scene: A Special Christmas Project

The holidays are a time for family, friends, and creating cherished memories. What better way to celebrate the season than by embarking on a heartwarming and creative project: building a wooden nativity scene. This project offers a unique opportunity to blend traditional craftsmanship with the spirit of Christmas, resulting in a treasured heirloom for years to come.

Gathering Your Materials

Start by gathering the necessary materials. You'll need wood, preferably softwood like pine or basswood, as they are easy to work with. A jigsaw, sandpaper, wood glue, and paint are essential. For added detail, consider using acrylic paint, glitter glue, or even fabric scraps for clothing. Choose a design for your nativity scene. You can find templates online or sketch your own. This will help you determine the size of each piece and ensure that they fit together seamlessly.

Crafting the Characters

Once you have your materials ready, it's time to bring your characters to life. Using your design as a guide, cut out the shapes for each figure from the wood. Pay attention to detail, ensuring the figures have distinct features and expressions. Smooth any rough edges with sandpaper for a polished finish. If you're feeling ambitious, consider adding intricate details to each piece, such as sculpted hair or clothing folds, using carving tools.

Bringing the Scene to Life

With all the figures ready, start assembling the scene. Use wood glue to attach the characters to a sturdy base made from plywood. Arrange them in a meaningful and visually appealing composition. Add elements like a stable, a manger, and a star to create a complete and festive setting. Once the glue dries, it's time to paint your creation.

Adding Color and Detail

The painting process is a chance to truly personalize your nativity scene. Choose colors that reflect the traditional Christmas spirit, such as earthy tones for the stable, warm browns for the characters, and a brilliant gold for the star. Add details like shadows and highlights to create depth and dimension. You can even use different paint textures, such as glitter glue for the star or fabric scraps for clothing, to create unique effects.

A Gift from the Heart

As you work on your wooden nativity scene, you'll find yourself reflecting on the true meaning of Christmas. This project becomes more than just a craft; it becomes a heartfelt expression of love and faith. When finished, it will be a special heirloom that you can pass down through generations, reminding them of the joy and warmth of the holiday season.

A wooden nativity scene is a unique and meaningful project that captures the spirit of Christmas. It's a chance to create a cherished keepsake, celebrate tradition, and share the joy of the season with loved ones.

Read More..

Stylish Wooden Lawn Chairs with Built-In Cupholders for Added Convenience

Stylish Wooden Lawn Chairs with Built-In Cupholders for Added Convenience

Stylish Wooden Lawn Chairs with Built-In Cupholders for Added Convenience

Elevate your outdoor living experience with the timeless elegance and practicality of stylish wooden lawn chairs featuring built-in cupholders. These chairs seamlessly blend form and function, providing a comfortable seating solution while keeping your beverages within easy reach. From classic designs to contemporary interpretations, wooden lawn chairs with cupholders offer a versatile and aesthetically pleasing option for any outdoor space.

The Appeal of Wooden Lawn Chairs

Wooden lawn chairs have long been a staple in outdoor settings, exuding a sense of warmth, durability, and natural beauty. Their inherent strength and resilience make them ideal for withstanding the elements, while their timeless appeal complements a wide range of outdoor styles.

Durability and Longevity

Crafted from high-quality hardwoods, wooden lawn chairs are built to last. Their sturdy construction can withstand the rigors of frequent use, ensuring years of enjoyment. With proper care and maintenance, these chairs can become cherished family heirlooms, passed down through generations.

Natural Beauty and Versatility

The natural grain patterns and warm hues of wood add a touch of elegance and sophistication to any outdoor space. Wooden chairs seamlessly blend with surrounding greenery, creating a harmonious and inviting atmosphere. Their versatility allows them to complement various styles, from traditional to modern.

The Convenience of Built-In Cupholders

Built-in cupholders revolutionize the outdoor seating experience, eliminating the need for separate tables or trays to hold your drinks. This thoughtful design detail adds a touch of practicality and convenience, ensuring your beverages are always within easy reach.

Enhanced Comfort and Relaxation

With your drinks securely in place, you can fully relax and enjoy your surroundings without having to worry about spills or reaching for your beverage. This feature allows you to truly unwind and savor the moment.

Increased Functionality and Versatility

Built-in cupholders transform wooden lawn chairs into multi-functional pieces of furniture, making them suitable for a wide range of activities. Whether you're hosting a backyard barbecue, reading a book in the garden, or simply enjoying the sunset, these chairs provide both comfort and practicality.

Styles and Designs of Wooden Lawn Chairs with Cupholders

Wooden lawn chairs with cupholders come in a wide array of styles and designs, catering to diverse aesthetic preferences and outdoor settings.

Classic and Traditional

For a timeless look, consider classic wooden lawn chairs with traditional designs. These chairs often feature intricate carvings, sturdy construction, and a comfortable, slightly reclined back. The cupholders are typically integrated into the arms of the chairs, maintaining a cohesive and elegant aesthetic.

Contemporary and Modern

For a more contemporary feel, opt for modern wooden lawn chairs with sleek lines and minimalist designs. These chairs often feature clean, geometric shapes and may incorporate innovative materials or finishes. The cupholders may be integrated into the frame of the chair or positioned on the arms, offering a subtle yet functional touch.

Rustic and Farmhouse

For a rustic and farmhouse aesthetic, choose wooden lawn chairs with a distressed or weathered finish. These chairs often feature natural wood tones and may incorporate rustic elements like rope accents or metal hardware. The cupholders can add to the rustic charm, offering a practical yet visually appealing detail.

Choosing the Right Wooden Lawn Chairs with Cupholders

When selecting wooden lawn chairs with cupholders, consider the following factors to ensure you make the best choice for your needs and preferences.

Comfort and Ergonomics

Choose chairs with comfortable seating, providing adequate support for your back and posture. Consider the width of the seat, the height of the back, and the overall ergonomics of the chair to ensure it meets your comfort requirements.

Materials and Construction

Opt for high-quality hardwoods known for their durability and resilience, such as teak, cedar, or oak. Ensure the construction is sturdy and the joints are well-secured to guarantee longevity and stability.

Style and Design

Choose a style that complements the overall aesthetic of your outdoor space and reflects your personal taste. Consider the existing furniture, decor, and landscaping elements when making your selection.

Cupholder Placement and Functionality

Evaluate the placement and functionality of the cupholders. Ensure they are securely mounted, accessible, and suitable for the types of beverages you plan to use. Consider the size and shape of the cupholders to accommodate various drink containers.

Caring for Your Wooden Lawn Chairs

Proper care and maintenance are essential to preserve the beauty and longevity of your wooden lawn chairs.

Regular Cleaning

Regularly clean your chairs with a soft brush or cloth to remove dirt, dust, and debris. Avoid using harsh chemicals or abrasive cleaners that can damage the wood.

Sealing and Protection

Apply a sealant or protective finish to the wood to help repel moisture, prevent stains, and protect against the elements. Choose a sealant specifically designed for outdoor furniture and follow the manufacturer's instructions.

Storage and Protection

During the off-season, store your chairs indoors or under a cover to protect them from rain, snow, and extreme temperatures. Consider using a furniture cover specifically designed for wooden chairs to shield them from the elements.

Conclusion

Stylish wooden lawn chairs with built-in cupholders combine the timeless appeal of natural wood with the convenience of practical design features. They offer a comfortable and functional seating solution for any outdoor space, enhancing relaxation and enjoyment while ensuring your beverages are always within easy reach. By considering factors such as comfort, materials, style, and functionality, you can select the perfect wooden lawn chairs with cupholders to elevate your outdoor living experience.

Read More..

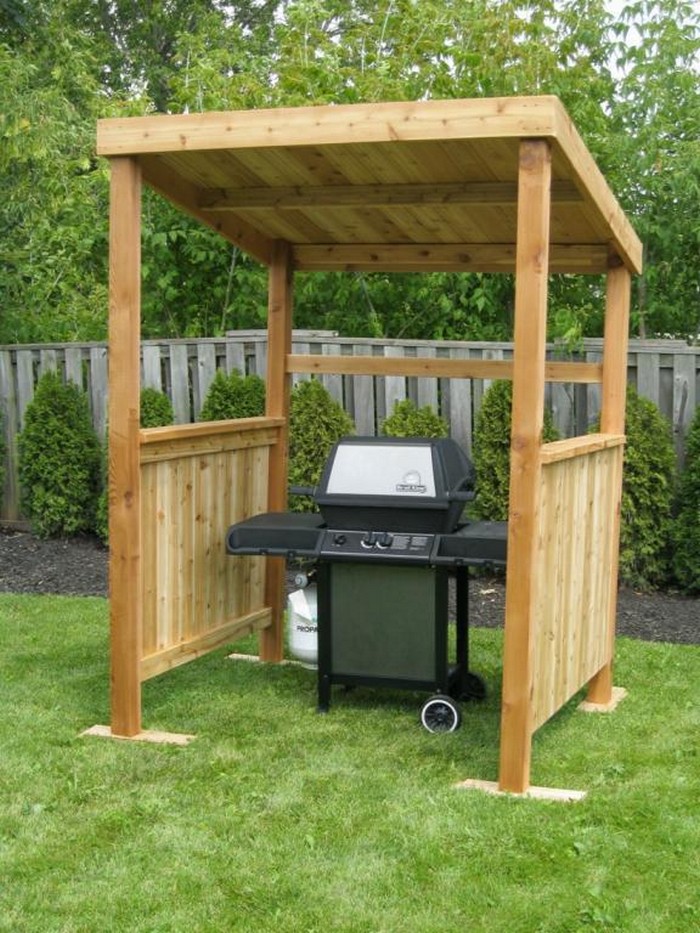
How to build a grill gazebo with a sturdy, low-maintenance frame

How to build a grill gazebo with a sturdy, low-maintenance frame

Building a Sturdy and Low-Maintenance Grill Gazebo

Alright, grill masters and backyard enthusiasts, let's talk about taking your grilling game to the next level! What could be better than a dedicated space for your grill, protected from the elements and looking sharp? That's right, we're talking about building a grill gazebo. But hold on, we're not just going for any old flimsy structure here. We're aiming for a sturdy, low-maintenance masterpiece that will stand the test of time (and maybe a few summer storms).

Building a gazebo might seem like a daunting task, but trust me, it's totally doable with a little planning and elbow grease. Let's break it down step-by-step, shall we?

Planning is Key: Setting the Stage for Your Grill Gazebo

Before we dive into the construction, let's get our ducks in a row. Here's what we need to consider:

1. The Perfect Location

First things first, pick the prime spot for your gazebo. Think about where the sun shines throughout the day, any existing obstacles, and the overall flow of your backyard. You'll want easy access to your grill, a comfortable seating area, and hopefully, a view to boot.

2. Size Matters

Now, measure that spot! You need to decide on the size of your gazebo, taking into account your grill, seating area, and any other things you want to fit under the canopy. Remember, you need enough room to move around comfortably.

3. Material Decisions: The Foundation of Your Structure

This is where the "low-maintenance" part comes in. You want materials that will hold up to the elements and not require constant upkeep. Here are some popular options:

  • Aluminum: Lightweight, corrosion-resistant, and easy to work with. A good choice for a DIYer!
  • Vinyl-Coated Steel: Strong, durable, and can be found in various colors and styles. It's a great option if you want a more traditional look.
  • Wood: Adds a rustic touch, but needs regular maintenance like staining and sealing. If you go this route, make sure to choose pressure-treated lumber for longevity.

Think about your budget, desired style, and maintenance level when making this decision. We'll dive deeper into the pros and cons of each material later on.

4. Roof Style: Shelter from the Elements

Time to choose a roof! Here are the most common choices:

  • Gable Roof: Classic, sturdy, and efficient for shedding water.
  • Hip Roof: Offers more stability and a sleek, modern look.
  • Flat Roof: A budget-friendly option, but requires a slight pitch for drainage.

Consider factors like snowfall in your area and the overall style of your home when making your choice.

Getting Down to Business: Building Your Grill Gazebo

Now for the fun part! Let's get those tools ready and start building.

1. Laying the Foundation: A Solid Base for Your Gazebo

Start by preparing the ground where your gazebo will stand. You can use a concrete pad, gravel bed, or even a wooden deck, depending on your preference and local building codes. Ensure a level foundation to avoid any future problems with your gazebo.

2. Building the Frame: The Backbone of Your Structure

This is where the real work begins. Here's a general guideline, assuming you're using metal framing, but remember to consult the manufacturer's instructions if you choose a different material.

  • Assemble the Columns: Start by attaching the base plates to the foundation. Then, connect the columns to the base plates using the supplied fasteners.
  • Connect the Rafters: Cut and attach the rafters to the columns, forming the framework for your roof. Make sure they are securely fastened with the proper fasteners.
  • Install the Wall Panels: Connect the pre-fabricated wall panels to the columns, creating the enclosed space for your gazebo.

3. Covering the Roof: Protection from the Elements

There are various roofing materials available, each with its own pros and cons. Here's a breakdown:

  • Metal Roofing: Durable, long-lasting, and easy to maintain. It also comes in various colors and styles.
  • Shingles: A classic and budget-friendly choice. However, they may require more maintenance than metal roofing.
  • Canvas: Provides shade and ventilation. It's a great option for a more casual, open-air feel, but it requires regular cleaning and replacement.

Choose the roofing material that best suits your needs and budget. Follow the manufacturer's instructions for installation.

4. Adding Finishing Touches: Making Your Grill Gazebo Shine

Now comes the fun part: adding the finishing touches! Here's what you can do:

  • Install Screens or Curtains: Enjoy the outdoors while keeping bugs at bay.
  • Add a Lighting System: Extend your grilling enjoyment into the evenings with some stylish lights.
  • Decorate Your Gazebo: Hang plants, add a cozy rug, or personalize the space with your favorite decor.

Let your creativity run wild and make this your ultimate grilling oasis!

Choosing the Right Materials: A Closer Look

Now that we've got the basics down, let's dive a little deeper into the materials you can use for your grill gazebo. Remember, we're aiming for sturdy and low-maintenance, so let's compare the options:

1. Aluminum: Lightweight and Low-Maintenance

  • Pros: Lightweight, corrosion-resistant, easy to work with, and comes in various styles.
  • Cons: Can be more expensive than other options.

If you're looking for a strong and durable gazebo that's relatively easy to build, aluminum is a great choice. It's perfect for those who want a long-lasting structure with minimal maintenance.

2. Vinyl-Coated Steel: Durable and Stylish

  • Pros: Strong, durable, and comes in various colors and styles. It's also relatively affordable.
  • Cons: Can be heavy to work with, and may require some regular cleaning to maintain its appearance.

Vinyl-coated steel is a great option if you want a gazebo that's both sturdy and stylish. It's a popular choice for those who want a more traditional look.

3. Wood: The Rustic Charm

  • Pros: Adds a rustic charm and can be customized with various stains and finishes.
  • Cons: Requires regular maintenance, including staining, sealing, and possibly treating for insects and rot. Can be more expensive than other materials.

Wood is a classic choice for outdoor structures, and it can create a warm and inviting feel. However, you need to be prepared for the ongoing maintenance that comes with it. If you're not afraid of a little work, wood can be a great option.

Safety First: Important Considerations

Building a gazebo involves working with tools and heavy materials. Safety should always be your top priority! Here are some key considerations:

  • Use the Right Tools and Equipment: Ensure your tools are in good working condition, and use the appropriate safety gear, such as gloves, goggles, and a dust mask.
  • Follow Building Codes: Check with your local building department for any permits or regulations that apply to your gazebo.
  • Get Help if Needed: If you're not comfortable with certain aspects of the construction, don't hesitate to ask for help from a friend or professional.
  • Inspect Your Work Regularly: Once your gazebo is built, check for any loose or damaged components regularly and address any issues promptly.

Remember, safety is paramount! By taking the necessary precautions, you can ensure a safe and enjoyable building experience.

Your Grill Gazebo: A Backyard Oasis

And there you have it! By following these steps and choosing the right materials, you can build a sturdy and low-maintenance grill gazebo that will become your favorite backyard gathering spot. Now, go out there and let your creativity shine! Enjoy those summer cookouts in style.

Read More..

The Best Wood Types for DIY Bedside Cabinets

The Best Wood Types for DIY Bedside Cabinets

The Best Wood Types for DIY Bedside Cabinets: A Guide to Building Your Dream Nightstand

So, you've decided to tackle a DIY project and build your own bedside cabinets. That's awesome! Not only will you save money, but you'll also have the satisfaction of creating something unique and personal. But with so many wood types out there, it can be overwhelming to choose the right one for your project. Don't worry, we've got you covered! This comprehensive guide will walk you through some of the best wood types for bedside cabinets, highlighting their pros and cons, and helping you make the best choice for your needs.

Whether you're a seasoned woodworker or a newbie just starting out, this guide will help you choose the perfect wood for your DIY bedside cabinets, ensuring your project turns out beautifully and stands the test of time.

Factors to Consider When Choosing Wood

Before we dive into specific wood types, let's talk about some key factors that will influence your decision:

Style and Aesthetic

Think about the overall look and feel you want for your bedside cabinets. Are you going for a rustic, modern, minimalist, or traditional style? The wood's grain pattern, color, and texture will play a significant role in achieving your desired aesthetic.

Durability and Strength

Bedside cabinets need to be sturdy enough to hold your books, lamps, and other essentials. Consider the weight they will be supporting and choose a wood that's known for its durability and strength. You don't want your nightstand to wobble or sag over time!

Workability

How comfortable are you working with different wood types? Some woods are harder to cut, sand, and finish than others. If you're a beginner, it's wise to choose a wood that's known for being forgiving and easy to work with.

Budget

Wood prices can vary widely, so it's essential to consider your budget. Some exotic hardwoods can be quite expensive, while others are more affordable. Don't be afraid to explore different options and find a wood that fits your price range.

Best Wood Types for DIY Bedside Cabinets

Now, let's get into the nitty-gritty and discuss some of the best wood types for bedside cabinets:

Oak

Oak is a classic choice for furniture due to its strength, durability, and beautiful grain pattern. It comes in various shades, from warm honey to rich brown, and can be stained to match any decor. Oak is also relatively easy to work with, making it suitable for both beginners and experienced woodworkers.

Pros:

  • Strong and durable
  • Beautiful grain pattern
  • Available in various shades
  • Relatively easy to work with
  • Cons:

  • Can be expensive, especially for higher-grade oak
  • Maple

    Maple is another excellent option for bedside cabinets. It's known for its hardness, smooth texture, and stunning grain pattern. Maple can range from creamy white to reddish brown, offering versatility in style. It's also relatively easy to work with and finishes beautifully.

    Pros:

  • Hard and durable
  • Smooth texture
  • Beautiful grain pattern
  • Easy to work with
  • Cons:

  • Can be prone to scratches and dents
  • Cherry

    Cherry wood is a favorite among woodworkers for its rich reddish-brown color, beautiful grain pattern, and warm, inviting feel. It's a harder wood, making it durable enough for everyday use. Cherry also has a pleasant aroma and ages gracefully, becoming darker and richer over time.

    Pros:

  • Rich reddish-brown color
  • Beautiful grain pattern
  • Durable and hard
  • Ages gracefully
  • Cons:

  • Can be expensive
  • Walnut

    Walnut is a luxurious wood known for its rich chocolate brown color, intricate grain pattern, and unique character. It's a strong and durable wood that's easy to work with and finishes beautifully. Walnut's beauty and elegance make it a popular choice for high-end furniture.

    Pros:

  • Rich chocolate brown color
  • Intricate grain pattern
  • Strong and durable
  • Easy to work with
  • Cons:

  • Can be expensive
  • Pine

    Pine is a softwood that's known for its affordability, light color, and distinctive knots. It's a forgiving wood that's easy to work with, making it ideal for beginners. Pine is often used for rustic furniture and can be stained or painted to create various styles.

    Pros:

  • Affordable
  • Light color
  • Easy to work with
  • Cons:

  • Soft and prone to dents and scratches
  • May require extra care to prevent warping
  • Birch

    Birch is a durable and versatile hardwood that's available in various grades. It has a light, creamy color and a fine, consistent grain pattern. Birch is easy to work with and finishes beautifully, making it a popular choice for furniture.

    Pros:

  • Durable and versatile
  • Light, creamy color
  • Fine and consistent grain pattern
  • Easy to work with
  • Cons:

  • Can be prone to scratches and dents
  • Plywood

    While not a solid wood, plywood is an excellent and budget-friendly alternative for bedside cabinets. It's made of thin layers of wood veneer glued together, creating a strong and stable material. Plywood is available in various wood types and finishes, offering versatility in style.

    Pros:

  • Affordable
  • Strong and stable
  • Available in various wood types and finishes
  • Cons:

  • May not have the same visual appeal as solid wood
  • Tips for Choosing the Right Wood for Your Project

    Now that you have a better understanding of different wood types, here are some additional tips to help you choose the right one for your bedside cabinets:

  • Consider the overall style of your bedroom. Do you want a rustic, modern, or traditional look? The wood you choose should complement your existing decor.
  • Think about how you plan to use your bedside cabinets. Will they be holding heavy books, lamps, or other items? Choose a wood that's strong and durable enough for your needs.
  • Don't be afraid to experiment. If you're unsure about a particular wood, consider purchasing a small sample piece to get a feel for it before committing to a larger quantity.
  • Visit a local lumberyard or woodworking store. They can offer valuable advice and help you choose the right wood for your project.
  • Factor in the cost of finishing. Some woods require more extensive finishing than others. Consider this when budgeting for your project.
  • Building your own bedside cabinets can be a rewarding and enjoyable experience. Choosing the right wood is crucial for achieving a beautiful and functional piece of furniture. By considering the factors discussed above and exploring the various wood types available, you'll be well on your way to creating a custom nightstand that perfectly complements your style and needs.

    Read More..

    Diy grill gazebo ideas for your backyard cooking area

    Diy grill gazebo ideas for your backyard cooking area

    DIY Grill Gazebo Ideas for Your Backyard Cooking Area

    A grill gazebo is an excellent way to enhance your backyard cooking experience, providing shelter from the elements and creating a dedicated space for grilling and entertaining. Building a DIY grill gazebo allows you to customize it to your needs and style, making it a unique and functional addition to your outdoor living area. This article will explore various DIY grill gazebo ideas to inspire your next backyard project.

    Choosing the Right Design and Materials

    Before diving into construction, consider the design and materials for your grill gazebo. These factors will influence the overall look, functionality, and durability of your structure.

    Design Considerations

    • Size and Shape: Determine the size needed to accommodate your grill, seating, and any additional features you want to include. Popular shapes include square, rectangular, hexagonal, and octagonal.
    • Roof Style: Options include a flat roof, gable roof, or a more elaborate hip roof. Consider the amount of rainfall in your area and choose a roof style that provides adequate drainage.
    • Enclosure Type: Decide whether you want a fully enclosed gazebo for privacy or a more open structure with screens or curtains for partial shade.
    • Materials: Popular choices include wood, metal, and vinyl. Wood offers a natural aesthetic and versatility, while metal is durable and requires less maintenance. Vinyl is a low-maintenance option that's resistant to weather damage.

    Material Selection

    • Wood: Consider pressure-treated lumber for the frame and posts to resist rot and insect damage. Redwood or cedar are durable and weather-resistant options. Use cedar or redwood for the roof if you want a natural look.
    • Metal: Aluminum is a lightweight and corrosion-resistant metal suitable for framing and roofing. Steel provides greater strength but requires proper rust prevention.
    • Vinyl: Vinyl framing and roofing offer low maintenance and durability. They're available in various colors and styles to match your home's aesthetics.

    Simple DIY Grill Gazebo Ideas

    Here are some easy-to-build DIY grill gazebo ideas to get you started:

    A-Frame Gazebo

    An A-frame gazebo is a straightforward design that requires basic carpentry skills. It involves constructing two triangular frames, connecting them at the top, and attaching a roof to the frame. You can create a simple A-frame gazebo using 2x4 lumber for the frame and plywood for the roof. Add a few side panels for partial shade, and you'll have a functional and stylish grill gazebo.

    Rectangular Gazebo with Fabric Canopy

    A rectangular gazebo with a fabric canopy is an easy and affordable option. You can create a frame using 4x4 posts and 2x4 lumber for the beams. The fabric canopy can be made from a waterproof canvas or tarp. Secure the canopy to the frame using rope or straps. This type of gazebo offers good shade and can be easily customized with different fabrics and decorations.

    Metal Gazebo with Removable Roof

    If you prefer a more modern and minimalist look, a metal gazebo with a removable roof is an excellent option. Metal framing is available in pre-cut kits, making assembly easier. You can choose a roof made of metal panels, polycarbonate sheets, or even a retractable awning. The removable roof allows you to enjoy open-air grilling on sunny days.

    Adding Features and Customization

    Once you've built the basic structure, you can add various features to enhance your grill gazebo's functionality and style.

    Lighting

    • LED Lights: Install LED strip lights under the roof overhang for ambient lighting. They're energy-efficient and provide a warm, inviting glow.
    • Pendant Lights: Hang stylish pendant lights from the roof beams to add a touch of elegance.
    • String Lights: String lights add a festive touch and create a cozy atmosphere.

    Storage

    • Shelves: Install shelves on the sides of the gazebo for storing grilling tools, spices, and other essentials.
    • Cabinets: Add cabinets under the counter for storing larger items like propane tanks or charcoal.
    • Hooks: Install hooks on the walls for hanging grilling tools and utensils.

    Seating

    • Built-in Seating: Include a built-in bench or a small table with stools for a more permanent seating area.
    • Outdoor Furniture: Add chairs, a table, or a sofa to create a comfortable and inviting space for dining and socializing.

    Finishing Touches

    • Paint or Stain: Add a touch of color and personality with paint or stain. You can choose a color that complements your home's exterior or create a bold statement with a contrasting hue.
    • Decorative Elements: Personalize your gazebo with decorative elements like potted plants, hanging baskets, wind chimes, or artwork.

    Safety Tips

    Safety should always be a top priority when building a grill gazebo. Here are some important considerations:

    • Fire Safety: Ensure adequate ventilation and place the grill a safe distance from combustible materials. Install a fire extinguisher nearby.
    • Electrical Safety: Use weatherproof wiring and outlets for any electrical devices you'll be using in the gazebo.
    • Structural Stability: Securely anchor the gazebo to the ground to prevent it from collapsing in strong winds.

    Conclusion

    Building a DIY grill gazebo is a rewarding project that enhances your backyard cooking area. With a little planning and effort, you can create a custom space that's perfect for grilling, entertaining, and enjoying the outdoors. From simple A-frame designs to more elaborate metal structures, there are endless possibilities for creating a unique and functional grill gazebo that meets your needs and style.

    Read More..

    Beginner's Guide to Crafting a Simple Squirrel Box

    Beginner's Guide to Crafting a Simple Squirrel Box

    Beginner's Guide to Crafting a Simple Squirrel Box

    Inviting squirrels to your backyard can be a delightful experience, providing endless entertainment as they scamper and play. A squirrel box, also known as a squirrel feeder or nesting box, offers a safe and cozy space for them to rest, store food, and even raise their young. This guide will walk you through the simple steps of building your own squirrel box, a rewarding project that requires minimal tools and skills.

    Materials You'll Need

    Before you start, gather the following materials:

    • Wood: Choose a rot-resistant wood like cedar, redwood, or pressure-treated lumber. You'll need a piece for the base, sides, back, and roof.
    • Screws: Use screws that are long enough to secure the wood pieces firmly.
    • Saw: A hand saw or circular saw for cutting the wood.
    • Drill: For pre-drilling holes to prevent splitting the wood.
    • Measuring Tape: For accurate dimensions.
    • Pencil: For marking cuts and measurements.
    • Hammer: If you're using nails instead of screws.
    • Sandpaper: To smooth out any rough edges.
    • Paint or Stain (Optional): For a decorative touch and added weather protection.

    Building the Squirrel Box

    1. Cut the Wood

    Using your saw and measuring tape, cut the wood into the following pieces:

    • Base: 12 inches by 12 inches
    • Sides: Two pieces, 12 inches by 6 inches
    • Back: 12 inches by 6 inches
    • Roof: 14 inches by 14 inches

    2. Assemble the Box

    Follow these steps to assemble the box:

    1. Attach the two side pieces to the base, using screws or nails. Ensure the sides are positioned upright.
    2. Attach the back piece to the base and sides, forming the back of the box.
    3. Pre-drill holes through the roof and base before attaching the roof. This will help prevent the wood from splitting. Secure the roof with screws or nails.
    4. For added stability, consider adding a small piece of wood to the front of the box as a ledge for the squirrels to perch on.

    3. Finishing Touches

    To finish your squirrel box:

    1. Sand down any rough edges to prevent splinters.
    2. If desired, apply a coat of paint or stain to protect the wood and add a decorative touch.
    3. Create an opening in the front of the box, about 3 inches wide and 4 inches high. This opening should be high enough to discourage predators and allow squirrels to enter easily.

    Installing the Squirrel Box

    Find a suitable location for your squirrel box:

    • Choose a spot that provides shade and protection from the elements.
    • Mount the box securely to a tree or post, at least 10 feet off the ground.
    • Make sure the box is facing away from prevailing winds.
    • Consider adding a squirrel feeder nearby to attract squirrels to the box.

    Enjoy Your New Squirrel Home

    Once your squirrel box is installed, sit back and enjoy watching the squirrels explore their new home. Remember to clean the box regularly to ensure a healthy and safe environment for your furry friends.

    Read More..

    Affordable Cold Frame Plans for Beginners

    Affordable Cold Frame Plans for Beginners

    Affordable Cold Frame Plans for Beginners

    A cold frame is a simple and inexpensive structure that can extend your gardening season by providing a protected environment for seedlings, transplants, and even overwintering plants. They work by trapping solar heat and providing a warmer microclimate than the surrounding air, which can be particularly beneficial in cooler climates.

    Building a cold frame is a rewarding DIY project that can be tackled by even the most novice gardeners. In this article, we will explore some affordable cold frame plans, suitable for beginners, and provide step-by-step instructions to help you construct your own.

    Choosing the Right Location

    The first step in building a cold frame is choosing the right location. Here are some important factors to consider:

    • Sunlight: A cold frame needs plenty of direct sunlight, ideally 6-8 hours a day. Choose a spot with minimal shade from trees or buildings.
    • Drainage: Ensure that the ground where you plan to place the cold frame is well-drained. A cold frame should not be placed in an area prone to standing water.
    • Accessibility: Choose a location that is easy to access for watering, weeding, and harvesting.

    Cold Frame Materials

    Cold frames can be built using a variety of materials. The most common and affordable options include:

    Wood

    Wood is a readily available and versatile material for cold frames. Choose durable woods like cedar, redwood, or pressure-treated lumber for longevity. Wood is easy to work with and can be cut to size using basic woodworking tools.

    • Advantages: Natural and aesthetically pleasing, easy to work with, relatively affordable.
    • Disadvantages: Requires regular maintenance to prevent rotting, can be susceptible to insects and moisture damage.

    Recycled Materials

    Get creative and use recycled materials to build your cold frame. Consider using old windows, doors, or even plastic storage bins. These options can be very economical, adding an element of upcycling to your project.

    • Advantages: Extremely cost-effective, eco-friendly, can offer unique design possibilities.
    • Disadvantages: May require more effort to assemble, potential limitations in size and shape.

    Other Materials

    Other materials like metal or brick can also be used for building cold frames. These materials can be more durable but are often more expensive and may require specialized tools and skills.

    • Advantages: Can be very durable and long-lasting, resistant to weather elements.
    • Disadvantages: More expensive than wood or recycled materials, may require advanced construction skills.

    Cold Frame Designs

    The design of your cold frame will depend on your personal preferences, the materials you choose, and the space available. Here are two basic cold frame plans that can be easily adapted to fit your needs:

    Simple Box Design

    This design involves building a rectangular box with a hinged lid. The box can be made from wood, recycled materials, or a combination of both. This design is straightforward to construct and allows for easy access to the plants inside.

    Materials Needed:

    • Wood boards (for the frame)
    • Hinges (for the lid)
    • Screws
    • Optional: Glass or clear plastic sheet for the lid

    Instructions:

    1. Cut the wood boards to the desired dimensions for the frame.
    2. Assemble the frame using screws, ensuring that the corners are square.
    3. Attach the hinges to the lid and the frame, allowing the lid to open and close smoothly.
    4. Optional: Cut a sheet of glass or clear plastic to fit the lid. Secure it to the lid using wood strips or adhesive.

    Lean-To Design

    This design uses a sloped surface, often a wall of a shed or house, to support the back of the cold frame. The front of the cold frame is built with a frame that rests on the ground, creating a sloping angle for the lid.

    Materials Needed:

    • Wood boards (for the frame)
    • Hinges (for the lid)
    • Screws
    • Optional: Glass or clear plastic sheet for the lid

    Instructions:

    1. Cut the wood boards for the front frame, ensuring they are angled to match the slope of the wall.
    2. Attach the hinges to the lid and the front frame.
    3. Secure the front frame to the wall, ensuring a strong and stable connection.
    4. Optional: Cut a sheet of glass or clear plastic to fit the lid. Secure it to the lid using wood strips or adhesive.

    Adding Ventilation

    Adequate ventilation is crucial for maintaining a healthy environment within the cold frame. It helps to regulate temperature and prevent moisture buildup, which can lead to disease.

    • Vents: Incorporate vents into the lid or sides of the cold frame to allow for air circulation. Vents can be simple openings, or you can use adjustable vents to control the airflow.
    • Lid Placement: Prop open the lid slightly on warm days to allow for ventilation and prevent overheating.

    Preparing the Cold Frame

    Once your cold frame is built, you need to prepare it for planting. Here's how to do it:

    • Clean and Disinfect: Clean the interior and exterior of the cold frame with a mild soap solution. Disinfect the cold frame using a bleach solution (1 part bleach to 10 parts water) to kill any potential pathogens.
    • Add Soil: Fill the cold frame with a well-draining potting mix or a blend of garden soil, compost, and peat moss.
    • Water Thoroughly: Water the soil thoroughly to ensure it is evenly moist.

    Using Your Cold Frame

    Now that your cold frame is ready, you can start using it to extend your gardening season.

    • Starting Seeds: Sow seeds directly in the cold frame a few weeks before the last frost date. This allows seedlings to get a head start before being transplanted outdoors.
    • Hardening Off Transplants: Gradually acclimate seedlings to outdoor conditions by placing them in the cold frame for a few hours each day, increasing the time gradually.
    • Overwintering Plants: Protect tender perennials and other plants from winter frost by moving them into the cold frame.

    Maintenance Tips

    Regular maintenance is essential for ensuring your cold frame remains in good condition and continues to function effectively.

    • Clean Regularly: Remove any debris or dead leaves from inside the cold frame. Clean the glass or plastic lid to allow for maximum sunlight penetration.
    • Check for Pests: Inspect your plants regularly for pests and take action to control any infestations.
    • Monitor Temperature: Keep a close eye on the temperature inside the cold frame, adjusting ventilation as needed.
    • Water as Needed: Water the plants regularly, especially during dry spells.
    • Winterize: Prepare your cold frame for winter by cleaning it thoroughly and removing any plant debris. If necessary, add a layer of insulation to the lid to help protect plants from freezing temperatures.

    Building a cold frame is a simple and rewarding project that can significantly enhance your gardening experience. With a little planning and effort, you can create an affordable and effective cold frame that will help you grow healthier and more productive plants, even in challenging climates.

    Read More..

    How to Protect Your Cold Frame from Extreme Weather

    How to Protect Your Cold Frame from Extreme Weather

    Protecting Your Cold Frame from Extreme Weather

    Cold frames are invaluable tools for gardeners, providing a protected environment for starting seeds, extending the growing season, and overwintering tender plants. However, their effectiveness hinges on their ability to withstand the vagaries of extreme weather. This article delves into the crucial steps you can take to safeguard your cold frame against the elements, ensuring its longevity and the well-being of your plants.

    Understanding the Threats

    Extreme weather encompasses a range of challenges for cold frames, each requiring a tailored approach. The most common threats include:

    • Excessive Heat: High temperatures can overheat the interior, causing plants to wilt and potentially succumb to heat stress.
    • Freezing Temperatures: Cold frames can be susceptible to frost damage, especially during the winter months or unexpected cold snaps.
    • Heavy Snow and Ice: Accumulated snow or ice can overload the frame, potentially causing structural damage or trapping heat within the enclosure.
    • Strong Winds: High winds can dislodge the frame's cover or even topple the entire structure, compromising its integrity.
    • Excessive Rain and Moisture: Continuous rainfall can lead to waterlogging, creating a breeding ground for diseases and hindering plant growth.

    Shielding from Excessive Heat

    Managing heat within the cold frame is paramount, particularly in the summer months. Here's how to mitigate the risk of overheating:

    Shade and Ventilation

    • Shading: Utilize a shade cloth or a lightweight fabric to reduce direct sunlight during peak hours. This helps to lower internal temperatures and protect plants from scorching.
    • Adequate Ventilation: Maintain proper airflow by ensuring the frame's vents are open during the hottest part of the day. This allows heat to escape and prevents a greenhouse effect.

    Moisture Management

    • Watering: Avoid overwatering, as it can exacerbate heat buildup. Water in the early morning or late evening when temperatures are cooler.
    • Mulch: Applying a layer of mulch around plants can help retain moisture, reduce evaporation, and regulate soil temperature.

    Protecting Against Freezing Temperatures

    Cold frames can be a valuable asset for overwintering plants, but safeguarding against frost damage is crucial. Here are some effective measures:

    Insulation and Covering

    • Insulation: Add extra layers of insulation, such as bubble wrap, blankets, or straw bales, to the frame's cover or walls. This helps to trap heat and prevent temperatures from dropping too low.
    • Covering: Use a thick layer of plastic sheeting or a frost blanket over the frame at night to create a barrier against cold air.
    • Heat Sources: In extreme cases, you can employ a heat source like a low-wattage heating pad or a small electric fan heater to provide additional warmth.

    Strategic Planting and Positioning

    • Location: Position the cold frame in a sheltered location, away from cold winds and drafts. Choose a spot that receives some sunlight during the day to help with heating.
    • Spacing: Allow adequate spacing between plants within the frame to prevent overcrowding, which can hinder airflow and increase the risk of frost damage.

    Withstanding Heavy Snow and Ice

    Heavy snow or ice can pose a significant challenge to cold frames. Here's how to manage these risks:

    Structural Reinforcement

    • Reinforcement: Fortify the frame's structure by adding additional bracing or supports, particularly around the corners and along the sides. This helps to prevent collapse under heavy snow loads.
    • Snow Removal: Regularly clear snow from the frame's cover to prevent excessive weight buildup. Avoid using sharp tools to prevent damage to the cover.

    Ventilation Management

    • Ventilation: Ensure that the frame's vents are clear of snow and ice to allow for proper airflow and prevent condensation buildup.
    • Cover Removal: If snow is particularly heavy or deep, you may need to temporarily remove the cover to prevent the frame from collapsing.

    Protecting from Strong Winds

    Strong winds can cause significant damage to cold frames, leading to cover displacement, structural failure, and even plant damage. Here are some solutions:

    Anchoring and Securing

    • Anchoring: Secure the frame to the ground using stakes, heavy objects, or a system of straps. This helps to prevent it from being blown over.
    • Windbreaks: Create a windbreak around the frame using tall plants, fencing, or other barriers to reduce the force of wind gusts.
    • Covering: Secure the cover to the frame using clips, weights, or even a rope and pulley system to prevent it from being lifted or dislodged.

    Managing Excessive Rain and Moisture

    Excessive rainfall can create a host of problems for cold frames, leading to waterlogging, fungal diseases, and plant stress. Here's how to address these concerns:

    Drainage and Ventilation

    • Drainage: Ensure proper drainage by placing the cold frame on a slightly sloped surface or incorporating a drainage system within the frame itself.
    • Ventilation: Open the vents during periods of heavy rain to allow for excess water to escape and prevent buildup within the frame.
    • Watering: Refrain from watering the plants during periods of excessive rainfall to prevent waterlogging.

    Plant Health

    • Plant Selection: Choose plants that are tolerant of moist conditions to minimize disease risk.
    • Monitoring: Keep a close eye on plants for signs of fungal diseases, such as leaf spots or mold, and address any issues promptly.

    Conclusion

    Protecting your cold frame from extreme weather is crucial for its longevity and the success of your gardening endeavors. By understanding the threats and implementing the appropriate preventative measures, you can ensure that your cold frame provides a safe and productive environment for your plants throughout the year. Regular maintenance, timely adjustments, and a proactive approach to managing extreme weather will allow you to reap the full benefits of cold frame gardening.

    Read More..

    How to Create a Squirrel Den Box from Scratch

    How to Create a Squirrel Den Box from Scratch

    Crafting a Squirrel Den Box from Scratch: A Comprehensive Guide

    For those seeking to provide a safe haven for local squirrels, constructing a squirrel den box is a rewarding endeavor. This detailed guide will walk you through the process of building a suitable den box from scratch, covering all essential aspects from design to installation. By following these steps, you can create a comfortable and secure abode for these nimble creatures, enriching your backyard ecosystem.

    Planning and Design

    Site Selection

    The first step is choosing a strategic location for your squirrel den box. Squirrels prefer elevated positions, so consider these factors:

    • Tree Height: Ideally, mount the box on a tree at least 10 feet high to discourage ground predators.
    • Tree Type: Select a healthy, sturdy tree that can support the weight of the den box.
    • Visibility: Choose a spot that is visible from a distance to allow for monitoring and maintenance.
    • Proximity to Food Sources: Locate the den box near natural food sources, such as nut trees, gardens, or bird feeders.

    Box Dimensions and Materials

    The size of the den box is crucial to accommodate the squirrels' needs and ensure proper ventilation.

    • Interior Dimensions: Aim for an interior space of approximately 10 inches wide, 10 inches high, and 12 inches deep. This provides sufficient room for a squirrel to turn around comfortably.
    • Material Choice: Opt for rot-resistant and durable wood like cedar, redwood, or pressure-treated lumber. Avoid plywood, as it can deteriorate quickly in the elements.
    • Ventilation: Incorporate ventilation holes on the sides and back of the box to promote air circulation and prevent moisture buildup.

    Construction Process

    Cutting and Assembling the Box

    Once you have gathered your materials, follow these steps to construct the den box:

    • Cut the Wood: Using a saw, cut the wood to the following dimensions:
      • Front Panel: 10 inches wide x 12 inches high
      • Back Panel: 10 inches wide x 12 inches high
      • Side Panels (2): 10 inches wide x 10 inches high
      • Bottom Panel: 10 inches wide x 12 inches long
      • Roof Panel: 12 inches wide x 14 inches long (to overhang the sides)
    • Assemble the Box: Attach the side panels to the front and back panels using screws or nails, forming the box's sides. Attach the bottom panel to the sides. Leave the roof panel for later.
    • Ventilation Holes: Drill several small ventilation holes (1/2-inch diameter) on each side panel and the back panel. Avoid placing holes near the entrance hole.

    Creating the Entrance Hole

    The entrance hole is a key element of the den box, and its size and placement should be carefully considered.

    • Placement: Position the entrance hole near the top of the front panel, approximately 4 inches from the top edge. This placement discourages predators from easily accessing the box.
    • Size: The entrance hole should be approximately 3 inches in diameter. This allows easy access for squirrels while deterring larger animals. You can use a drill bit or a hole saw to create the entrance hole.
    • Protection: Consider adding a piece of wood or metal around the entrance hole to prevent the hole from widening over time due to the squirrels' movements.

    Attaching the Roof

    The roof of the den box provides protection from the elements and should be securely attached.

    • Hinges: Install hinges on the back of the roof panel to create a hinged lid. This allows for easy access for cleaning and monitoring.
    • Fasteners: Securely attach the roof to the box using screws or nails, ensuring the lid closes tightly.
    • Overhang: The roof should overhang the sides of the box by at least an inch on all sides to provide additional protection from rain and snow.

    Preparing for Installation

    Painting or Staining

    Painting or staining the den box is optional but can help to improve its durability and aesthetics.

    • Weatherproof Paint: Choose a weatherproof paint or stain that is safe for wildlife and won't leach harmful chemicals. Apply multiple coats for optimal protection.
    • Color Choice: While color preferences vary, natural wood tones or earth-toned colors blend seamlessly with the surrounding environment.
    • Drying Time: Allow the paint or stain to dry completely before proceeding with installation.

    Creating a Secure Mount

    Proper mounting ensures the den box remains secure and stable, preventing it from falling or becoming dislodged.

    • Mounting Bracket: Use a heavy-duty metal bracket designed for birdhouses or squirrel den boxes. These brackets are typically pre-drilled for easy installation.
    • Screws: Secure the bracket to the tree trunk using sturdy screws long enough to penetrate the wood sufficiently.
    • Stability: Once the bracket is securely mounted, attach the den box to the bracket using additional screws. Make sure the box is level and properly secured.

    Installation and Maintenance

    Installing the Den Box

    After completing the construction and preparation, follow these steps to install the den box:

    • Choose a Suitable Tree: Select a tree that is healthy, sturdy, and located in a safe area away from foot traffic and potential hazards.
    • Mount the Bracket: Attach the mounting bracket to the tree as described above. Ensure the bracket is securely fastened.
    • Secure the Box: Carefully attach the den box to the mounting bracket using screws. Make sure the box is level and firmly attached.

    Ongoing Maintenance

    To ensure the den box remains a safe and inviting home for squirrels, regular maintenance is necessary:

    • Cleaning: Clean the den box once or twice a year, removing debris, droppings, and old nesting materials. Use a mild soap and water solution and allow the box to dry completely before reinstalling.
    • Inspections: Regularly inspect the den box for damage, such as cracks, broken boards, or loose screws. Repair or replace any damaged parts promptly to prevent further deterioration.
    • Monitoring: Observe the den box for signs of squirrel activity, such as droppings, nutshells, or movement within the box. This helps confirm that the box is being used and that the squirrels are thriving.

    Conclusion

    Creating a squirrel den box is a rewarding and eco-friendly project that can enhance your backyard ecosystem and provide a safe haven for these fascinating creatures. By following these detailed instructions, you can build a durable and comfortable den box that will attract and support local squirrel populations. Remember to choose a strategic location, pay attention to proper construction techniques, and maintain the box regularly for optimal results. With a little effort, you can contribute to the well-being of these playful and intelligent animals while enriching your natural surroundings.

    Read More..

    Building Your First Squirrel Box: Free Plans

    Building Your First Squirrel Box: Free Plans

    Building Your First Squirrel Box: Free Plans

    Hey there, fellow nature enthusiast! Are you tired of watching squirrels scamper around your yard, looking for a safe place to stash their treasures? Well, you're in luck! Today, we're going to build a cozy squirrel box, a haven for those furry little acrobats.

    Building a squirrel box is a fun and rewarding project, and it's a great way to add a touch of whimsy to your backyard. Plus, you'll be providing a much-needed home for these adorable creatures. Let's get started!

    Choosing the Right Location

    Before you even think about grabbing your hammer and nails, you need to pick the perfect spot for your squirrel box. Squirrels are smart and cautious, so they'll be looking for a location that's safe, secure, and offers a good view of their surroundings.

    Here are some factors to consider:

    • Tree Selection: Choose a healthy, mature tree with sturdy branches that can support the weight of the box. Avoid trees that are near busy roads, power lines, or areas where there's a lot of foot traffic.
    • Height: Ideally, you want to mount the box at least 10 feet above the ground. This will help to deter predators and give the squirrels a sense of security.
    • Sunlight: Find a spot that receives plenty of sunlight, especially in the morning. This will help to keep the box warm and dry.
    • Accessibility: Make sure you have access to the spot where you want to mount the box, especially if you'll need to clean it or refill the food.

    Once you've chosen the ideal location, it's time to gather your materials and get ready to build!

    Materials You'll Need

    Don't worry, you won't need a whole lumberyard to build this squirrel box. We're keeping it simple and budget-friendly.

    • Wood: You'll need about 16 square feet of untreated, weather-resistant wood, like cedar or redwood. You can find this at most home improvement stores. This will be used to build the box, roof, and entrance panel.
    • Screws: Get a variety of sizes, ranging from 1-inch to 2-inch screws, to secure the wood together. You can use either wood screws or galvanized screws for durability.
    • Brackets: You'll need four strong brackets to attach the box to the tree. They should be made of metal and designed for outdoor use. Choose brackets that are large enough to support the weight of the box.
    • Drill: You'll need a power drill to make pilot holes for the screws and to make the entrance hole for the squirrels.
    • Saw: A handsaw or circular saw will help you cut the wood to size. You may also need a jigsaw for some curved cuts.
    • Safety Gear: Always wear safety goggles, gloves, and a dust mask when working with power tools and wood.
    • Optional: If you want to paint your squirrel box, choose a non-toxic paint that's safe for wildlife. You can also add a small bird feeder to the side of the box, to provide a convenient source of food for your furry friends.

    Building the Squirrel Box: Step-by-Step

    Okay, now comes the fun part â€" putting your squirrel box together! Here's a breakdown of the steps:

    Step 1: Building the Box

    1. Cut four pieces of wood to the desired size for the sides of the box. For example, you could make each side 12 inches long and 10 inches high.
    2. Screw the sides together using wood glue and your screws to form a rectangular box.
    3. Cut a piece of wood for the bottom of the box and attach it to the sides using screws and glue.

    Step 2: Creating the Roof

    1. Cut two pieces of wood to the same length as the sides of the box and about 8 inches wide. These will form the two sides of the roof.
    2. Cut another piece of wood to the same length as the sides of the box and the same width as the sides of the roof. This will form the back of the roof.
    3. Cut another piece of wood to the same length as the sides of the box, but with a width that is slightly less than the width of the roof sides. This will form the front of the roof.
    4. Attach the roof sides to the front and back of the roof using screws and glue. Be sure to create a slight overhang for the front of the roof to help protect the squirrels from rain.
    5. Attach the roof to the box using hinges. This will allow the roof to be opened for easy cleaning and inspection.

    Step 3: Making the Entrance

    1. On one of the sides of the box, cut a circular opening with a diameter of about 3 inches. This will be the entrance for the squirrels.
    2. To make the entrance a bit more appealing to squirrels, you can cut a small piece of wood (about 1 inch wide and 3 inches long) that fits perfectly in the opening. Use screws and glue to attach the wood to the inside of the box, forming a ledge for the squirrels to stand on. This ledge will also help to prevent rain from getting into the box.

    Step 4: Adding Finishing Touches (Optional)

    1. If you choose to paint your squirrel box, now's the time to do it. Apply a few coats of non-toxic paint, allowing each coat to dry completely before applying the next. Let the paint dry thoroughly before moving on to the next step.
    2. You can also add a small bird feeder to the side of the box for your squirrel visitors. Just attach it securely using screws or brackets.

    Mounting the Squirrel Box

    You're almost there! Now it's time to give your squirrel box a permanent home.

    1. Select a sturdy branch on the tree you chose, making sure it's at least 10 feet above the ground.
    2. Attach the brackets to the chosen branch using screws and a drill. Make sure they are securely fastened to the branch.
    3. Attach the squirrel box to the brackets using screws and a drill. Make sure the box is level and secure. Be careful not to overtighten the screws as this can damage the wood.

    Tips for Attracting Squirrels

    You've built the perfect squirrel box, now it's time to make it a welcoming haven. Here are a few tips to attract those furry acrobats:

    • Provide Food and Water: Place a bird feeder near the box, but away from the entrance. Squirrels love seeds, nuts, and fruit. You can also offer a small dish of fresh water.
    • Keep it Clean: Regularly check the box for signs of damage or nesting materials that need to be removed. This will encourage squirrels to use the box.
    • Patience is Key: It may take some time for squirrels to discover your new box and decide to make it their home. Don't be discouraged if it doesn't happen overnight!

    Enjoy Watching Your New Squirrel Tenants!

    Congratulations! You've now built your very own squirrel box and are ready to welcome your furry friends. Remember, building a squirrel box is not just about creating a home for these playful creatures; it's also about enriching your backyard and creating a connection with nature. So sit back, relax, and enjoy watching the squirrels enjoy their new abode!

    Read More..

    Magic box building guide: diy woodworking project

    Magic box building guide: diy woodworking project

    Build a Magical Magic Box: A DIY Woodworking Project

    Imagine a box that could hold secrets, spark imaginations, and bring a touch of wonder to your life. This isn't just a box â€" it's a magic box! And you can create it yourself with this fun and achievable woodworking project.

    This magic box isn't just for children either. It's a great project for anyone who wants to add a little bit of enchantment to their space, or who wants to learn the basics of woodworking. So grab your tools and let's get started!

    What You'll Need

    Before you start, gather these materials:

    • Wood: Choose a wood that's easy to work with, like pine or plywood. You'll need enough to make a box about 8" x 8" x 8".
    • Wood glue
    • Wood screws
    • Saw
    • Sandpaper
    • Measuring tape
    • Pencil
    • Drill
    • Clamps
    • Finishing supplies (paint, stain, varnish)
    • Optional: Hinges, magnetic catches, decorative elements

    Building Your Magic Box

    Cutting the Wood

    First, measure and cut your wood. You'll need six pieces:

    • Four pieces for the sides of the box, each measuring 8" x 8"
    • Two pieces for the top and bottom of the box, each measuring 8" x 8"

    Use a saw to carefully cut the wood to size.

    Assembling the Box

    Now, it's time to assemble your box.

    1. Apply wood glue to the edges of the four side pieces.
    2. Carefully join the side pieces to form a square, ensuring the corners are aligned. Clamp the pieces together to secure them while the glue dries.
    3. Once the glue is dry, attach the bottom piece to the base of the box using wood screws.
    4. Repeat the process for the top piece, attaching it to the top of the box with wood screws.

    Finishing Touches

    Now comes the fun part! It's time to give your magic box some personality.

    • Sand the box to smooth out any rough edges.
    • Paint the box, stain it, or varnish it to your liking.
    • Add hinges, magnetic catches, or other decorative elements to create a truly unique magic box.

    Enhancing the Magic

    Now, it's time to truly make your magic box come alive! Here are some ideas:

    • Add a hidden compartment or a secret door to make it feel truly magical.
    • Paint a mysterious symbol or design on the outside of the box.
    • Fill the box with magical objects, like crystals, feathers, or herbs.
    • Use a small, battery-operated light to add a glowing effect.

    A Magic Box for Everyone

    Your magic box is ready to hold anything from precious memories to whimsical trinkets. Share it with friends and family, and let the magic unfold!

    Remember, this is just a guide. Don't be afraid to experiment and add your own creative touches to make your magic box truly unique!

    Read More..

    Building a Squirrel Den Box: Key Tips and Tricks

    Building a Squirrel Den Box: Key Tips and Tricks

    Building a Squirrel Den Box: Key Tips and Tricks

    Enrich your backyard ecosystem and provide a safe haven for playful squirrels by building a cozy den box! This project is rewarding, fun, and relatively easy to tackle. With a few key tips and tricks, you'll be well on your way to becoming a squirrel haven builder.

    Choosing the Right Materials

    The foundation of your squirrel den box lies in selecting the right materials. Opt for durable and weather-resistant options to ensure a long-lasting home for your furry friends.

    Wood Selection

    Choose rot-resistant woods like cedar, redwood, or pressure-treated lumber. Avoid softwoods like pine or spruce, as they can easily deteriorate in the elements.

    Hardware and Fasteners

    Use stainless steel screws or galvanized nails for a secure and lasting construction. Avoid using regular nails, as they can rust and weaken the den box over time.

    Designing Your Squirrel Den Box

    The size and design of your squirrel den box will determine its functionality. Consider the following factors when planning:

    Dimensions

    Aim for a den box that is at least 12 inches wide, 12 inches high, and 18 inches deep. This provides ample space for the squirrel to move around comfortably.

    Entry Hole

    Cut an entry hole that is 4-5 inches in diameter. This size is perfect for squirrels while keeping out larger predators. Place the entry hole on the side or the top of the box, away from the rain.

    Ventilation

    Incorporate ventilation holes on the sides or back of the box. This allows for proper airflow and prevents the den box from becoming too humid.

    Construction Steps

    Once you've chosen your materials and designed your den box, you're ready to start building! Follow these steps to ensure a sturdy and squirrel-friendly structure.

    1. Cut the wood to the desired size.
    2. Assemble the sides and bottom of the den box using your chosen fasteners.
    3. Cut the entry hole and ventilation holes.
    4. Attach the top of the box, ensuring a secure fit.
    5. Add a roof if desired to provide additional protection from the elements.
    6. Sand the edges of the box to prevent splinters and to smooth out any rough areas.
    7. Apply a waterproof sealant or paint to the exterior of the den box to protect it from rain and moisture.

    Placement and Installation

    The final step in your squirrel den box journey is to find the perfect spot for your creation!

    Location

    Choose a location that is protected from direct sunlight and rain. Ideally, select a tree with a thick branch that can support the weight of the den box.

    Height

    Mount the den box 6-10 feet off the ground. This height provides safety from predators and allows the squirrel to enjoy a clear view of its surroundings.

    Securing the Box

    Securely fasten the den box to the branch using heavy-duty wire or metal straps. Ensure that the mounting is strong enough to withstand winds and squirrels jumping around.

    Tips for Encouraging Squirrel Occupancy

    Once your squirrel den box is in place, there are a few things you can do to encourage your new furry tenants to move in.

    1. Provide Bedding: Place a handful of soft materials like shredded paper, leaves, or cloth inside the den box. This provides comfortable bedding for the squirrel.
    2. Offer a Food Source: You can entice squirrels to your den box by placing a small amount of food, like nuts or seeds, near the entry hole.
    3. Be Patient: It may take some time for squirrels to discover and occupy your new den box. Don't be discouraged if it takes a few weeks.

    Enjoy Your Squirrel Haven!

    You've created a safe and welcoming home for squirrels, enriching your backyard and providing hours of enjoyable wildlife watching. Remember to keep the den box clean and free of debris, and enjoy the delight of seeing squirrels happily inhabiting their new abode!

    Read More..

    Building a Cold Frame on a Budget

    Building a Cold Frame on a Budget

    Building a Cold Frame on a Budget

    Starting a garden can feel like an expensive endeavor. However, with a little creativity and some elbow grease, you can create a valuable tool for your garden without breaking the bank. A cold frame is a simple structure that allows you to extend your growing season and start seedlings earlier in the spring. They can also help protect delicate plants from harsh weather conditions. The best part? You can build a cold frame on a budget with materials you may already have around the house or find at a local thrift store.

    Choosing Your Materials

    The key to building a cold frame on a budget is to get creative with your materials. You can use recycled materials like old windows, doors, or even pallets.

    Window Frames

    Old windows are an ideal material for cold frames. You can often find them for free or at a very low cost at local salvage yards or online marketplaces. The glass panels provide excellent light transmission, and the frames offer structural support.

    Doors

    If you have an old door lying around, it can be used as the base of your cold frame. You can simply remove the hinges and lay the door flat on the ground. You'll want to find a way to prop up the door to make it easier to access your plants.

    Pallets

    Pallet wood is another readily available and free material that can be repurposed for a cold frame. You can use the slats to create a frame and then cover it with a sheet of clear plastic or glass. Just make sure that the wood is treated for outdoor use.

    Building the Cold Frame

    Once you have your materials, you can start building your cold frame. The following steps provide a general guideline for creating a window frame cold frame. Modify the steps depending on the materials you choose.

    1. Create the Base

    Begin by constructing the base of your cold frame. Use pressure-treated lumber or repurposed materials to build a sturdy rectangle. The size of the base will depend on your needs. You can make it as large as you need to accommodate the plants you will be growing.

    2. Attach the Window Frames

    Securely attach the window frames to the base. Make sure that the frames are positioned so that the glass panels face south for maximum sunlight exposure. If you're using an old door, you can attach the window frames to the top of the door.

    3. Add a Hinged Lid

    To make it easier to access your plants, create a hinged lid for your cold frame. Attach the lid to the base with hinges. You may need to add a prop or two to keep the lid in place when you want it open for ventilation.

    4. Choose a Location

    Choose a sunny spot in your garden for your cold frame. The location should receive at least 6 hours of sunlight per day. Also, make sure that the area is well-drained to prevent waterlogging. A slight incline will also help to prevent water pooling.

    5. Add Insulation

    Add insulation to your cold frame to help regulate the temperature. You can use materials like bubble wrap, cardboard, or even old blankets. This step will help to keep the temperature inside the cold frame consistent, even when the weather is cold outside.

    6. Enjoy Your Cold Frame

    Once your cold frame is built, fill it with potting soil and plant your seeds or transplants. Be sure to monitor the temperature and humidity inside the cold frame and adjust the ventilation as needed. Enjoy extending your growing season and getting a jump on spring!

    Tips for Success

    Here are a few extra tips to keep in mind when building and using your cold frame:

    • Use clear plastic or glass for the lid to allow maximum light transmission.
    • Add a layer of mulch or straw to the soil to help retain moisture and regulate temperature.
    • Monitor the temperature inside the cold frame regularly, especially during extreme weather conditions.
    • Ventilate the cold frame daily to prevent condensation buildup.
    • Water the plants inside the cold frame as needed, but avoid overwatering.

    By following these tips, you can create a successful cold frame that will help you grow healthy, thriving plants all year round. Your garden will thank you! Happy growing!

    Read More..

    How to design and make a wooden clock

    How to design and make a wooden clock

    Designing and Crafting a Wooden Clock: A Comprehensive Guide

    The allure of handcrafted wooden clocks lies in their unique blend of functionality and aesthetic appeal. These timepieces, crafted with care and precision, exude a warmth and character that transcends mass-produced counterparts. Embarking on the journey of designing and making a wooden clock is a rewarding endeavor, allowing you to bring your artistic vision to life while acquiring valuable woodworking skills. This comprehensive guide will walk you through the process, from initial design concepts to the final finishing touches, empowering you to create a timepiece that will be cherished for years to come.

    1. Conceptualization: Envisioning Your Wooden Clock

    The foundation of any successful project lies in a well-defined concept. Before diving into the technical aspects, dedicate time to envisioning your ideal wooden clock. This phase involves exploring various design elements, considering your desired aesthetic, and defining the functionalities you wish to incorporate.

    1.1. Aesthetic Inspirations:

    Consider the following factors when conceptualizing the aesthetics of your wooden clock:

    • Style: Do you prefer a classic, modern, rustic, or contemporary design? Explore different styles to find one that resonates with your taste.
    • Shape: Experiment with various shapes, such as circular, square, rectangular, or even irregular forms. Think about the overall visual impact and how the shape will integrate with the clock's surrounding environment.
    • Wood Species: Select a wood species that complements the desired style and aesthetics. Consider factors like grain patterns, color, and durability.
    • Color Palette: Choose a color scheme that harmonizes with the wood species and overall design theme. Consider natural wood tones, stains, paints, or a combination thereof.
    • Embellishments: Incorporate decorative elements like carvings, inlays, or metal accents to enhance the clock's visual appeal.

    1.2. Functionality and Features:

    Determine the functionalities and features you wish to incorporate into your wooden clock. This may include:

    • Clock Movement: Choose a clock movement that suits the desired design and functionality. Options include quartz movements, mechanical movements, and pendulum movements.
    • Hands: Select clock hands that complement the overall design and are compatible with the chosen clock movement. Consider material, style, and length.
    • Numbers: Choose a style for the numbers, whether roman numerals, Arabic numerals, or even custom designs. Determine the material and method of application.
    • Additional Features: Consider incorporating extra features such as a chime, thermometer, hygrometer, or even a built-in alarm.

    2. Design and Planning: Translating Vision into Reality

    With your concept defined, it's time to translate your vision into a tangible design. This phase involves creating detailed drawings and plans, ensuring all components are accurately sized and proportioned.

    2.1. Creating Detailed Drawings:

    Draft detailed drawings of each component of your wooden clock, including:

    • Clock Face: Draw the clock face to scale, specifying the diameter or dimensions, and the positions of the numbers and hands.
    • Case: Create drawings of the clock case, showing the shape, thickness, and dimensions of all sides, including any decorative elements.
    • Movement Mounting Plate: Design a mounting plate to secure the clock movement to the clock case, ensuring proper alignment and stability.
    • Hands and Numbers: Draw the clock hands and numbers to scale, specifying their length, width, and placement on the clock face.

    2.2. Choosing Materials and Tools:

    Select materials and tools appropriate for your design and woodworking skills:

    • Wood: Choose the wood species based on its suitability for the design, availability, and your budget. Consider factors like grain pattern, density, and workability.
    • Clock Movement: Select a clock movement that is compatible with the design and your desired features. Consider accuracy, reliability, and power requirements.
    • Woodworking Tools: Gather the necessary tools for cutting, shaping, sanding, and assembling the clock components. This may include saws, chisels, planes, sanders, and clamps.
    • Finishing Materials: Choose finishes to enhance the appearance of the wood, protect it from wear and tear, and potentially provide a color change. Options include stains, paints, varnishes, and oils.

    3. Construction: Bringing the Design to Life

    Now that you have your design plans and materials, it's time to put your woodworking skills to the test and craft the components of your wooden clock.

    3.1. Cutting and Shaping:

    Following your detailed drawings, carefully cut and shape the wood components. This step requires precision and attention to detail to ensure proper fit and alignment during assembly.

    • Clock Face: Cut the clock face to the specified dimensions, ensuring it's flat and smooth. If using a circular shape, you may need to use a band saw or scroll saw.
    • Case: Cut and shape the sides and base of the clock case according to your design. Use a table saw or band saw to achieve accurate cuts.
    • Movement Mounting Plate: Cut the mounting plate to the required size and shape, ensuring it has a smooth surface for attaching the clock movement.
    • Hands and Numbers: Cut the clock hands and numbers to their respective dimensions. Consider using a scroll saw or laser cutter for intricate designs.

    3.2. Assembly and Installation:

    Once the components are cut and shaped, begin assembling the clock. This involves joining the various parts, securing the clock movement, and attaching the hands and numbers.

    • Clock Face: If desired, create a raised edge around the clock face using a router or chisel. This will help to elevate the face and improve its visual appeal.
    • Case: Assemble the sides of the clock case using wood glue and clamps. Ensure the joints are tight and flush. Attach the base to the case, creating a stable foundation for the clock.
    • Movement Mounting Plate: Secure the movement mounting plate to the case, ensuring proper alignment and stability. This plate will serve as the base for attaching the clock movement.
    • Clock Movement Installation: Attach the clock movement to the mounting plate using screws. Align the movement to the center of the clock face and ensure it's securely fastened. Connect the movement to the power source.
    • Hands and Numbers: Attach the hands and numbers to the clock face, ensuring they are properly aligned and secured. Consider using a clock hand tool for precise placement.

    4. Finishing and Polishing: Adding the Final Touches

    With your wooden clock assembled, it's time to add the finishing touches to enhance its appearance and protect the wood.

    4.1. Sanding and Smoothing:

    Thoroughly sand all surfaces of the clock to remove any imperfections, smooth out rough edges, and prepare the wood for finishing.

    • Sanding Process: Start with coarser grit sandpaper (80-120 grit) and gradually progress to finer grits (220-400 grit) for a smooth finish. Sand with the grain of the wood to avoid creating scratches.
    • Sanding Corners and Edges: Pay extra attention to corners and edges, ensuring they are rounded and smooth.
    • Cleaning: After sanding, carefully clean the clock using a tack cloth or a vacuum cleaner to remove any dust or debris.

    4.2. Applying Finishes:

    Choose a finish that complements the wood species and the overall design aesthetics. Apply the finish carefully, ensuring even coverage and a smooth, durable finish.

    • Stains: Stains enhance the natural beauty of the wood by adding color and depth. Choose a stain that complements the wood species and the desired color scheme.
    • Paints: Paints offer a wide range of color options and can be used to create bold accents or a completely different look. Choose a paint specifically designed for wood and apply multiple thin coats for a smooth finish.
    • Varnishes: Varnishes provide a protective coating that enhances the shine and durability of the wood. Options include gloss, semi-gloss, and matte finishes.
    • Oils: Oils penetrate the wood, enhancing its natural beauty and providing a protective layer. Popular choices include tung oil, linseed oil, and teak oil.

    4.3. Final Polishing:

    After applying the finish, polish the clock to achieve a smooth and even surface. Use a soft cloth and a polishing compound or wax.

    • Polishing Technique: Apply a thin coat of polishing compound or wax to the clock using a soft cloth. Work the product evenly across the surface, following the grain of the wood. Allow the product to dry before buffing to a shine with a clean cloth.
    • Final Inspection: Once the polishing is complete, carefully inspect the clock for any imperfections or uneven areas. Make any necessary adjustments or touch-ups as needed.

    5. Conclusion: A Timepiece to Cherish

    Crafting a wooden clock is a rewarding journey that allows you to express your creativity and woodworking skills. From initial design concepts to the final finishing touches, each step contributes to the creation of a unique and personalized timepiece. With patience, precision, and a touch of artistic flair, you can transform your vision into a beautiful and functional wooden clock that will be cherished for years to come.

    Read More..